Ratchet & Clank: Rift Apart | All CraiggerBears locations
One of the hardest trophies in Ratchet & Clank: Rift Apart is for finding all the CraiggerBears. There’s an item called the Map-O-Matic that reveals all treasures. But even that can’t help you here. The Craiggerbears in Ratchet & Clank: Rift Apart never show up on the map. Instead, you’ll have to hunt for them. They’re pretty small, but there’s some key elements that’ll help.
Firstly, they’re almost always in an area with no combat. Secondly, there’s one on every planet in the game for a total of 9 CraiggerBears. Thirdly? Well, we’ve got the entire lot listed below, with screenshots for your ease of use. Note, however, that not all 9 planets are available to you at the start of the game.
That’s a polite way of saying there may be spoilers ahead. If you don’t want to know planet names, look away now. If you’re still with us, this is how you get the “unBEARably Awesome” trophy, which is a Gold trophy for finding all the CraiggerBears. Right, on with the list!
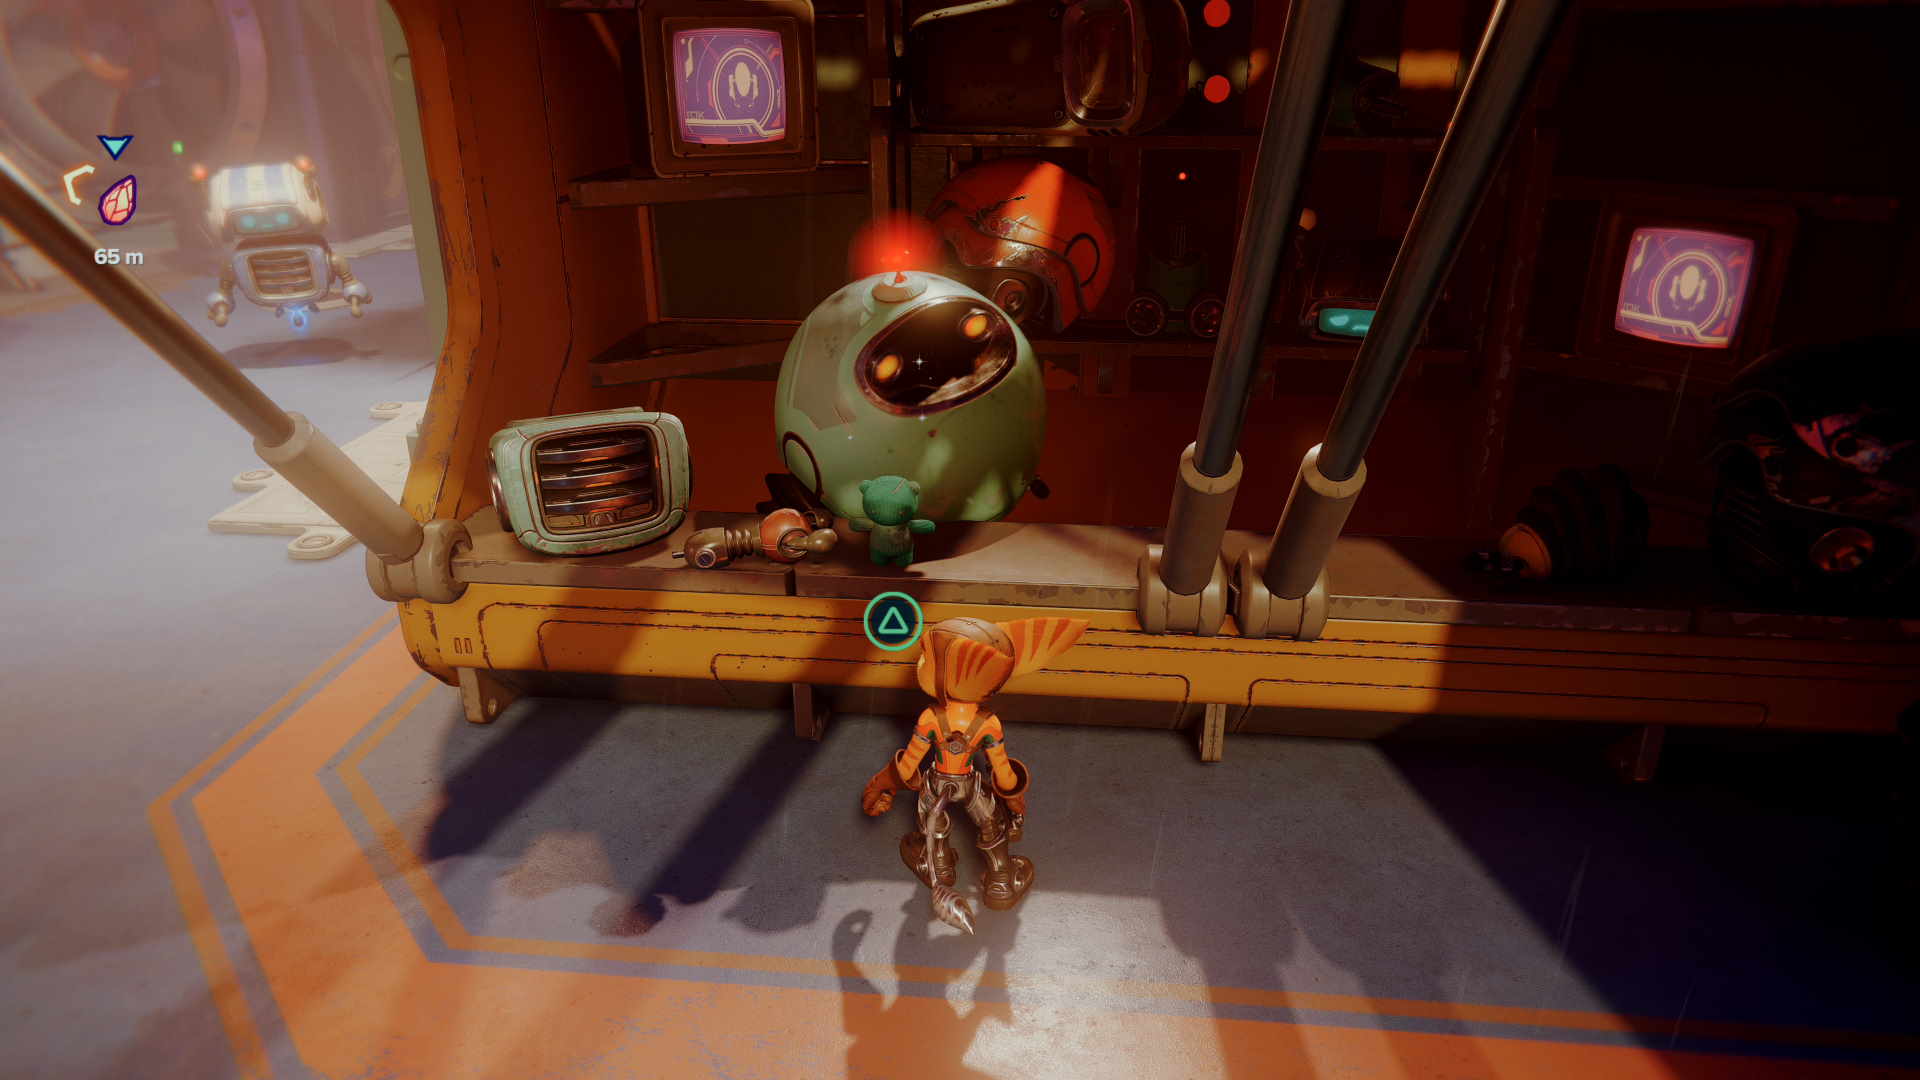
CraiggerBear 1: Corson V
Very close to Mrs Zurkon, you need to head West from her location.
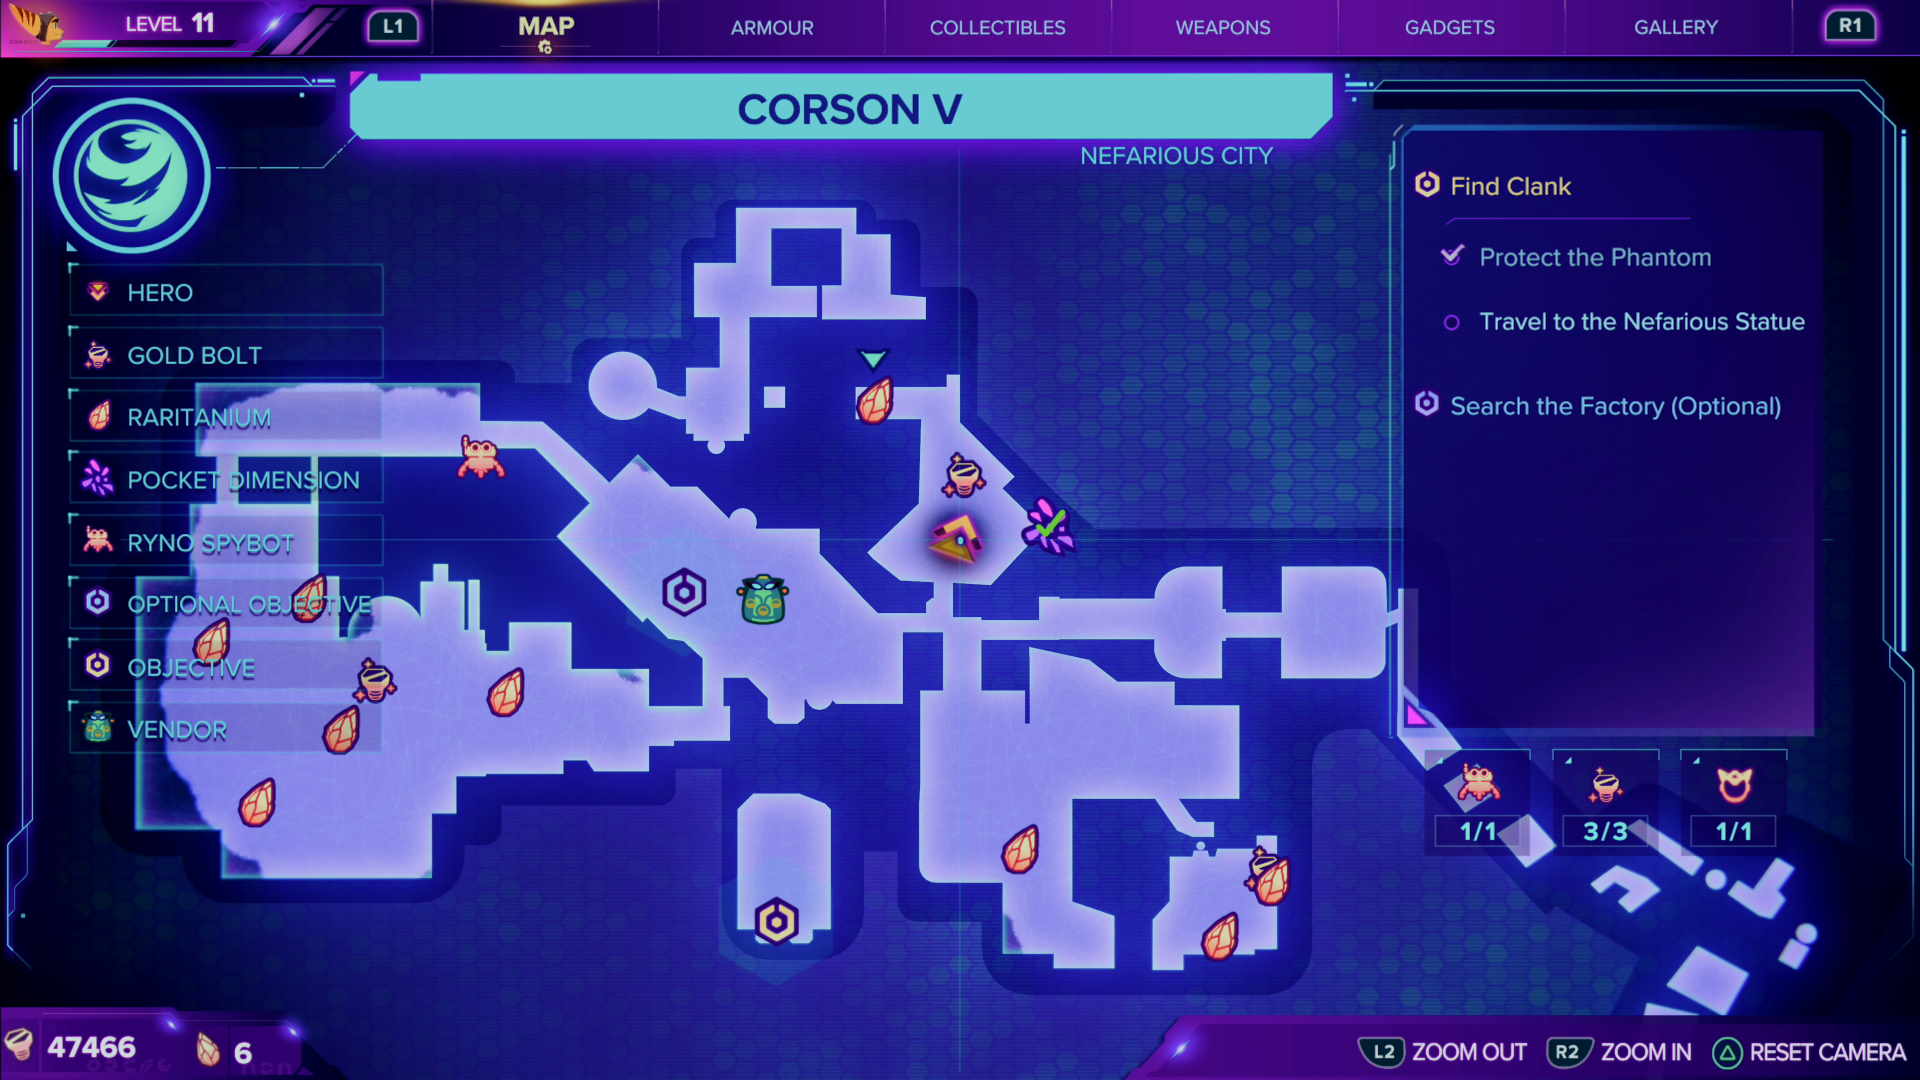
There is a small circular robot NPC who has the first green CraiggerBear on his counter.
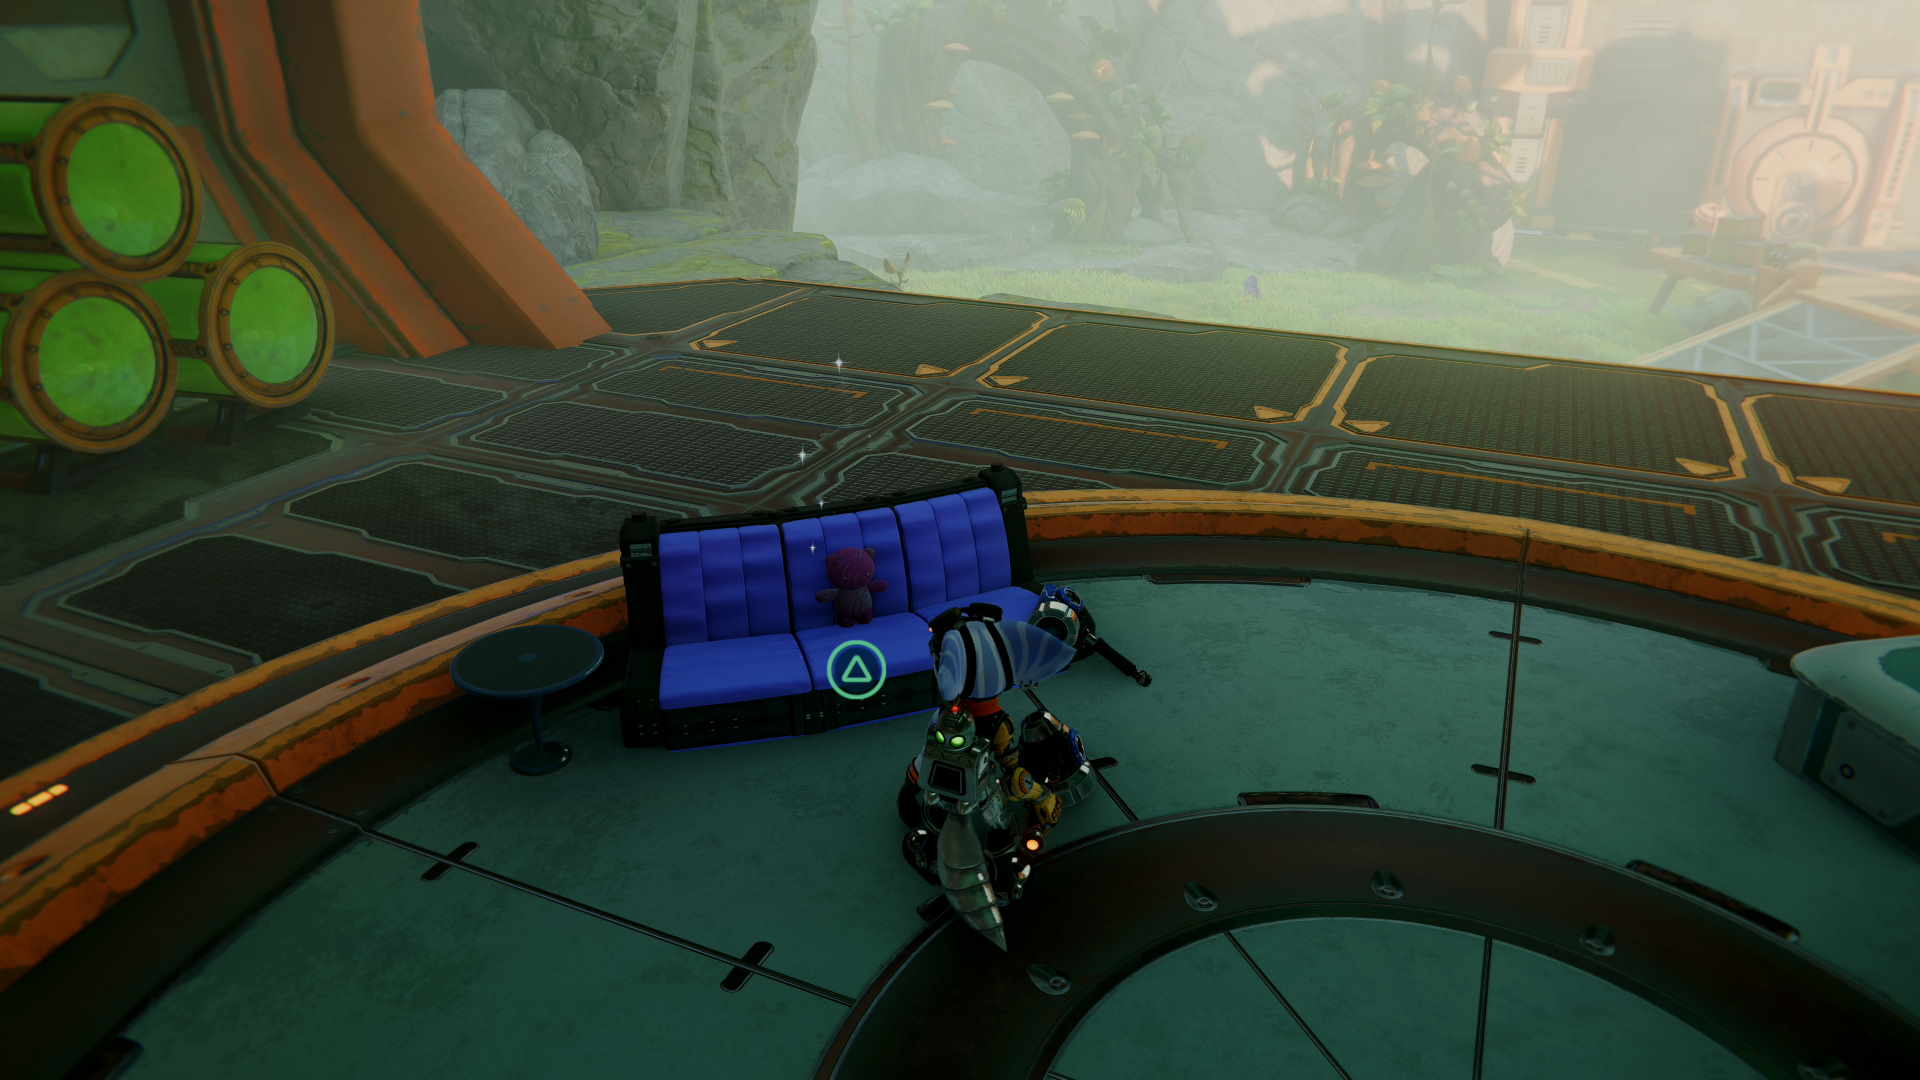
CraiggerBear 2: Sargasso
Possibly the easiest one in the game to miss, the second Ratchet & Clank: Rift Apart CraiggerBear is in Rivet’s hideout.
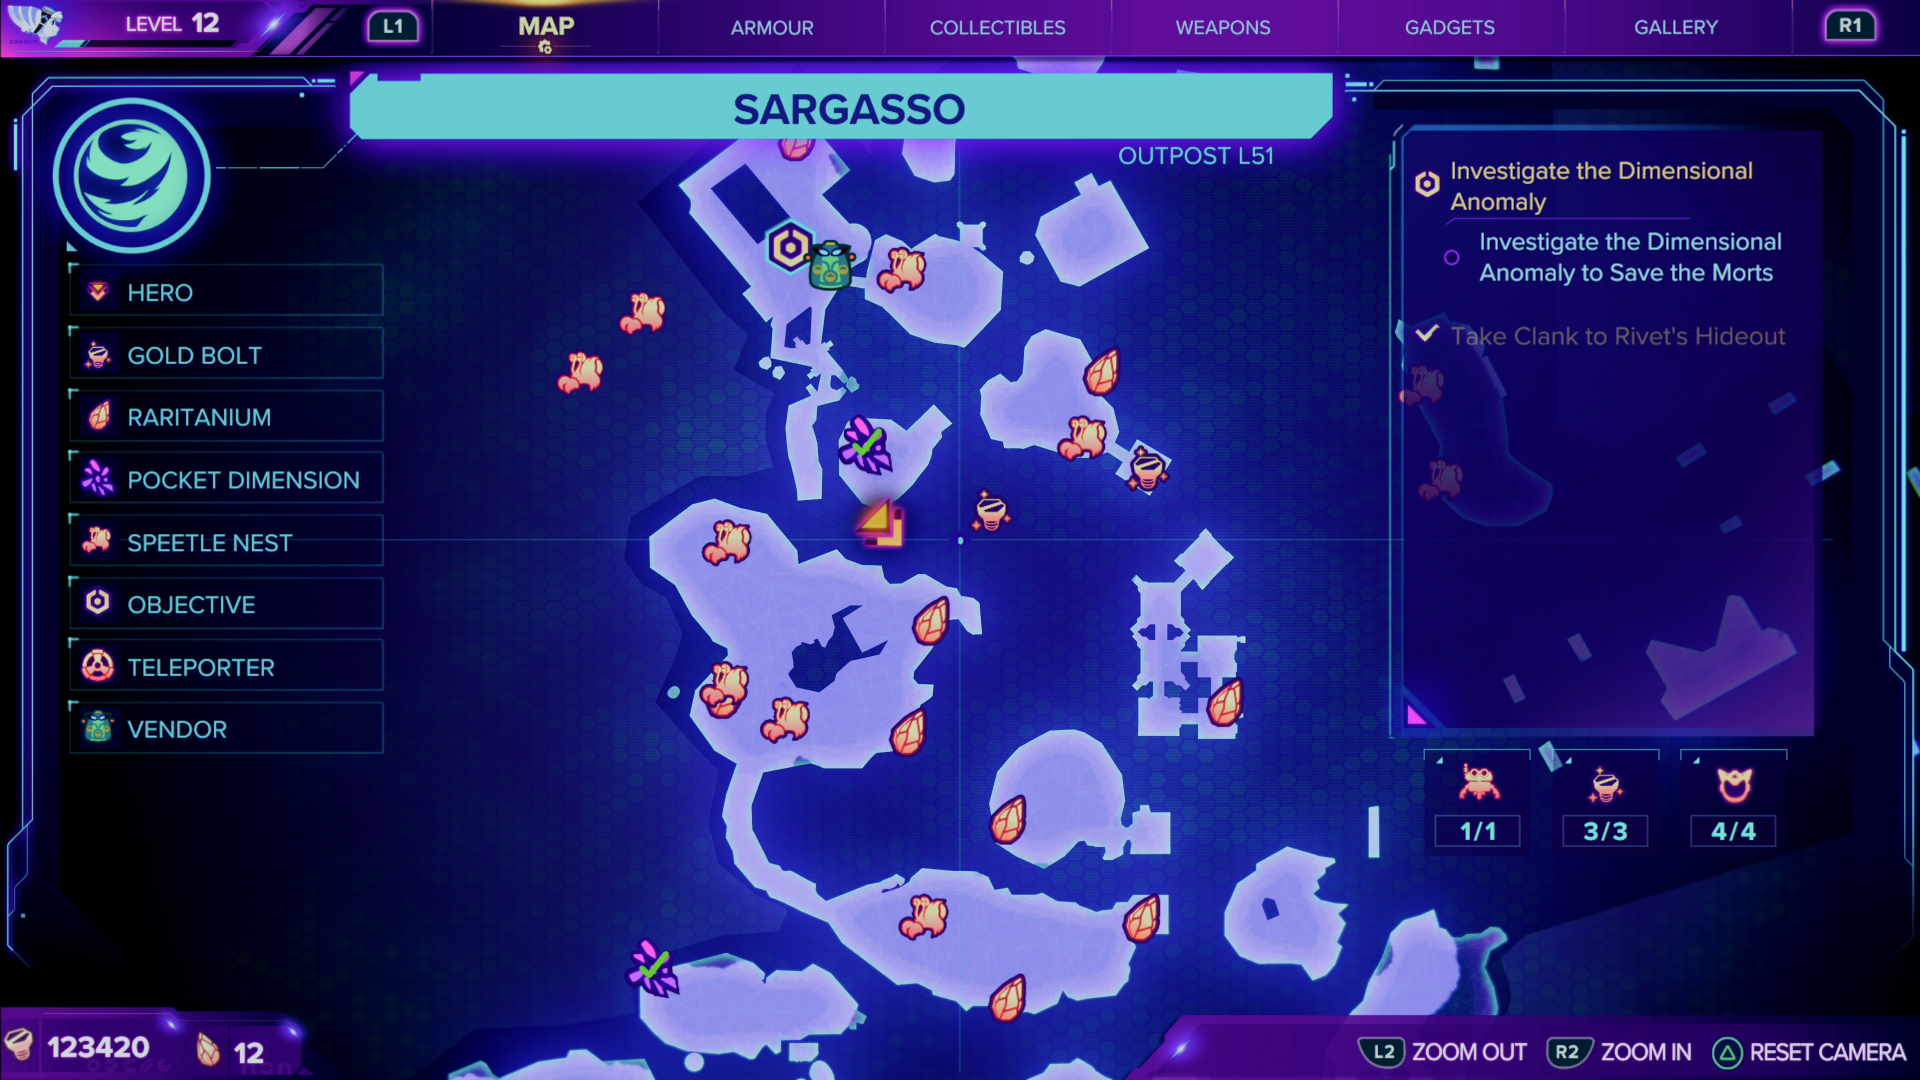
You can return here after the first boss fight. It’s very easy to spot once you arrive, as a pink bear is sat on the sofa waiting for you to collect.
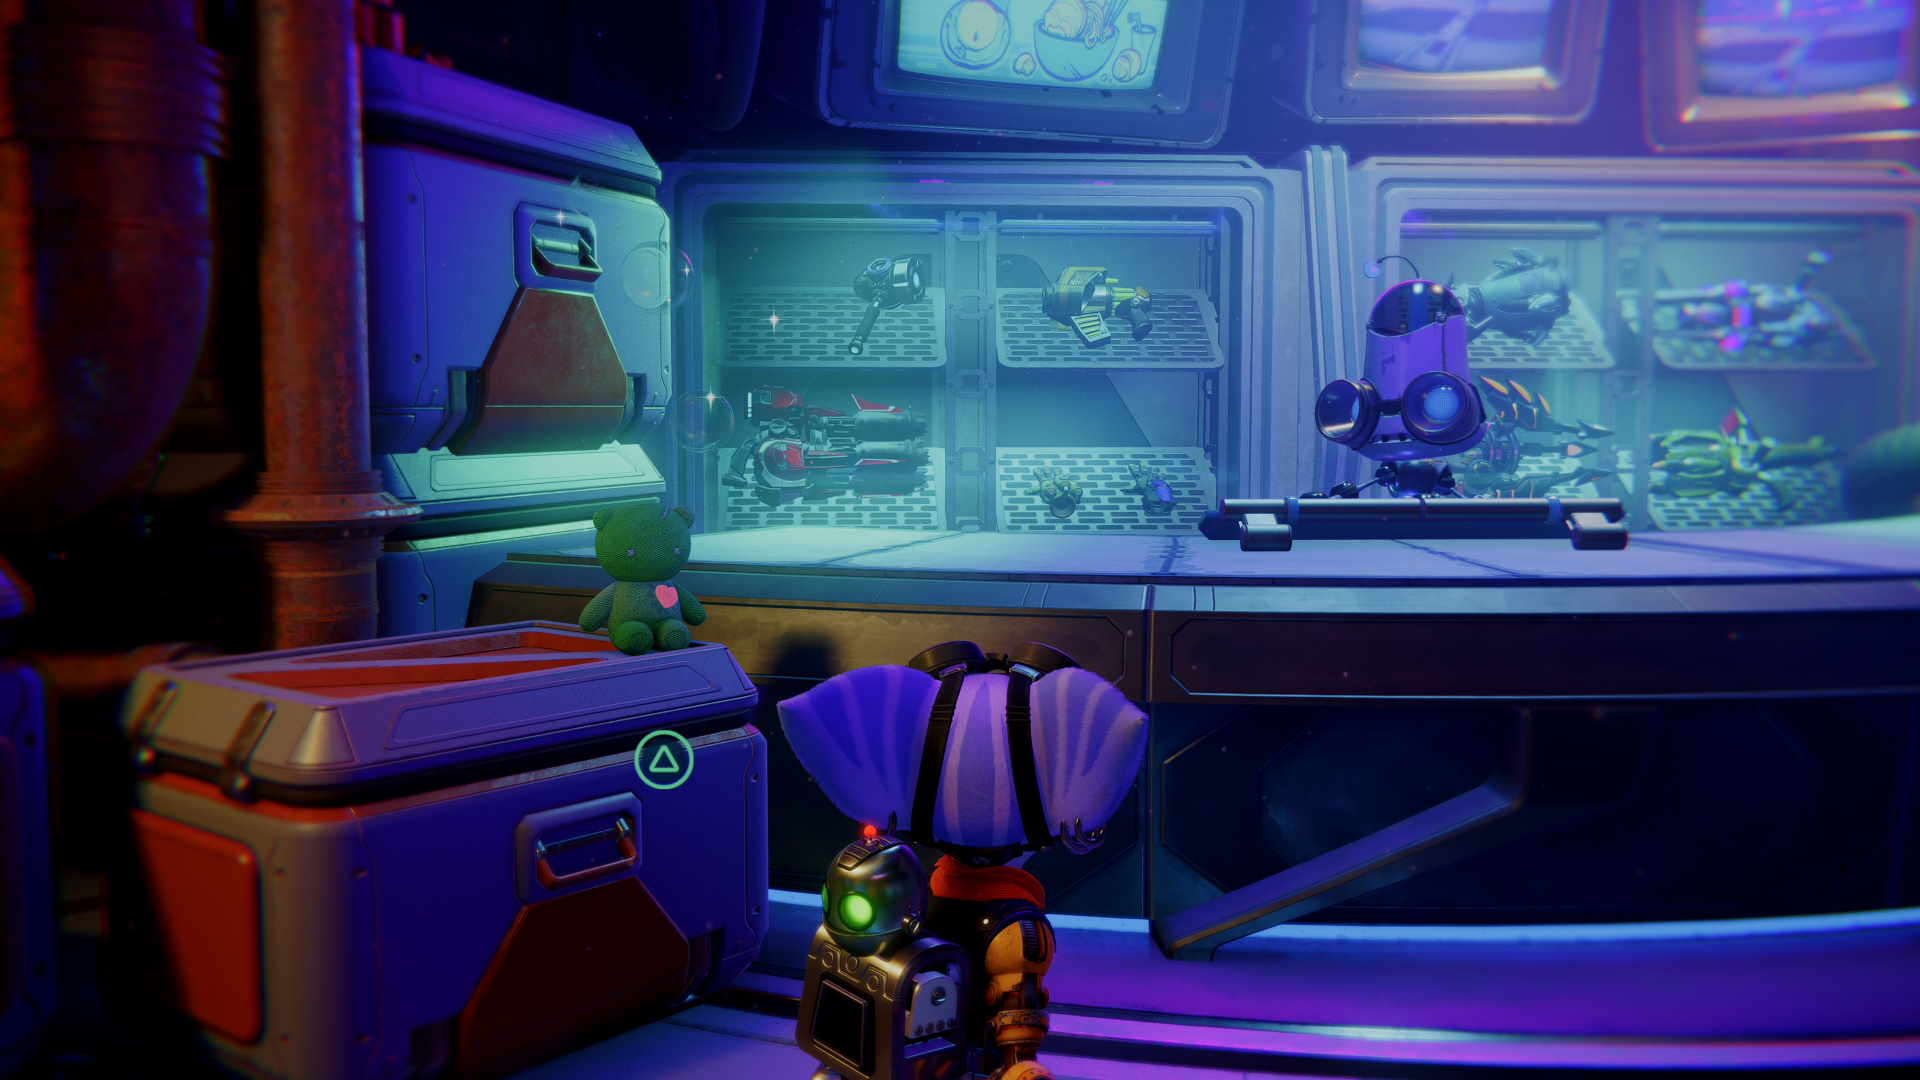
CraiggerBear 3: Scarstu Debris Field
Possibly the easiest bear to find in Rift Apart. This one feels like it was put there as a tutorial to alert you to the collectibles.
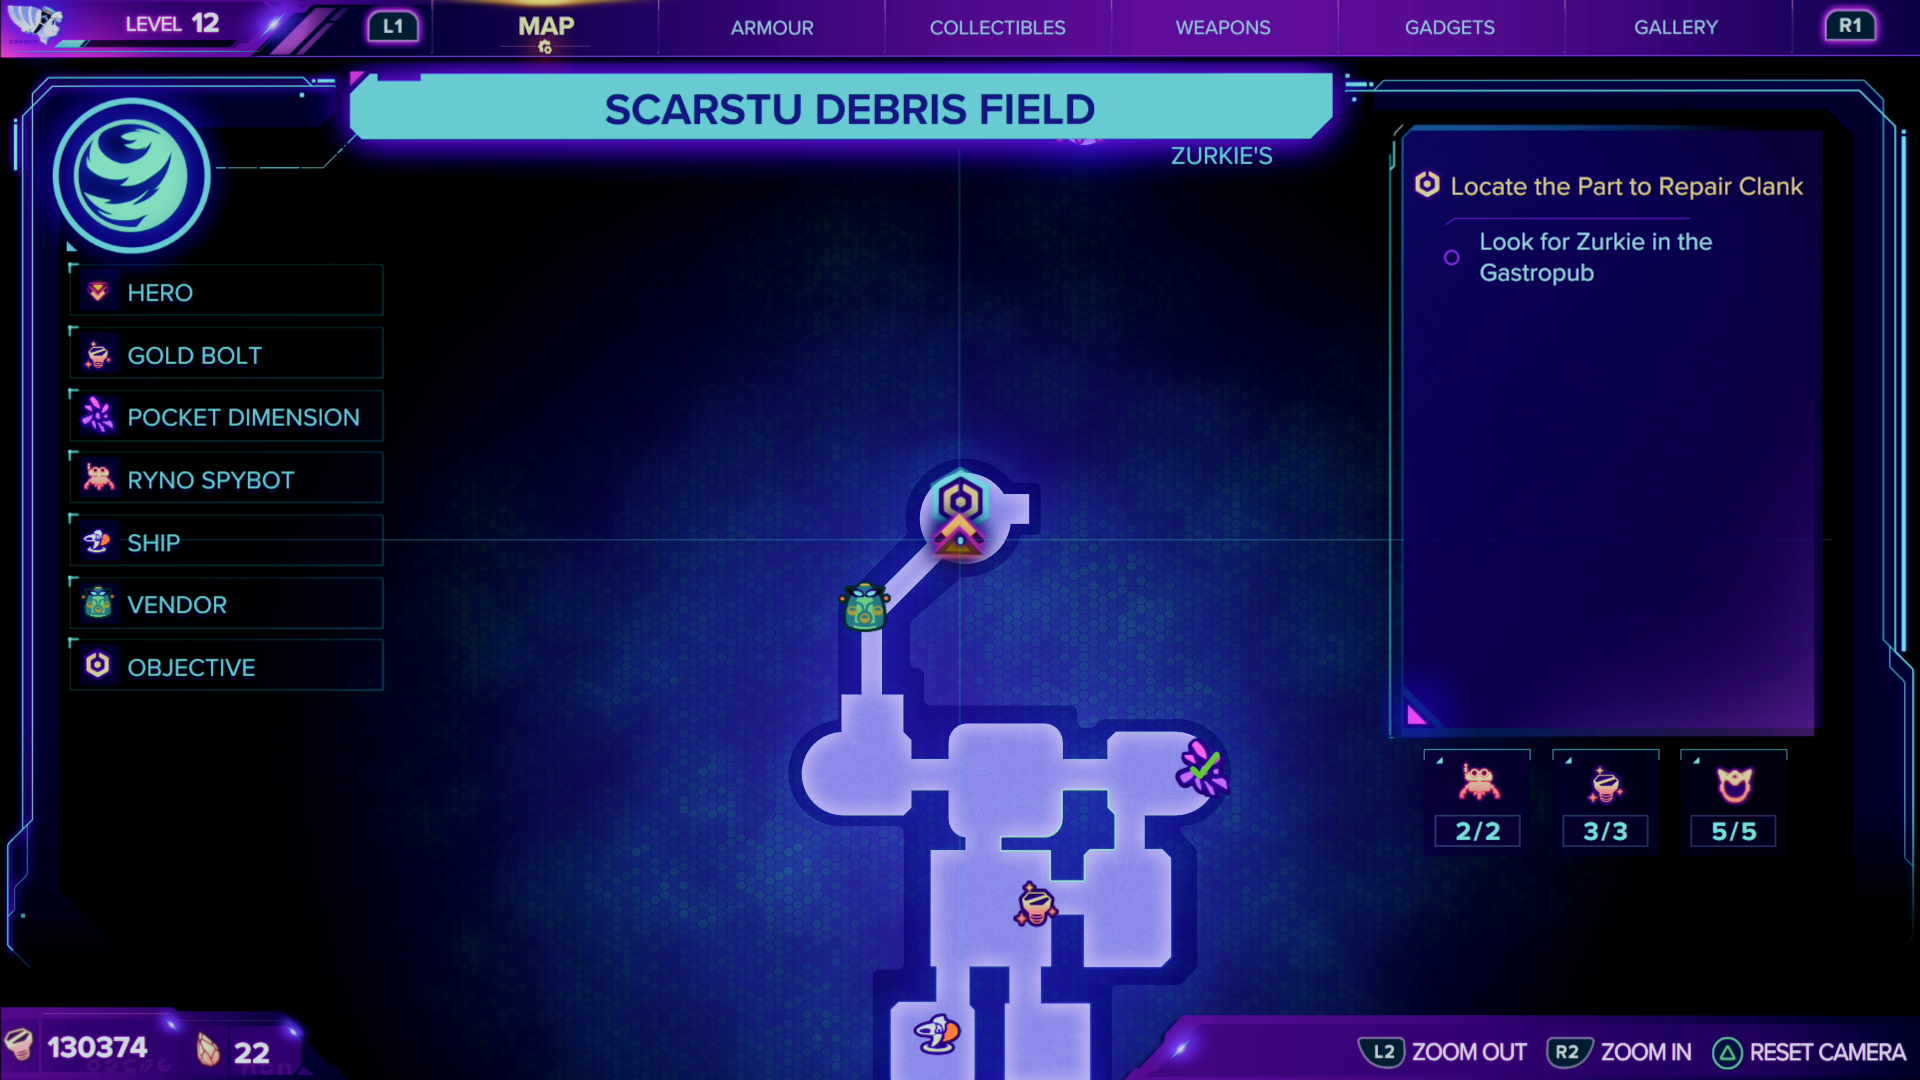
As soon as you enter Zurkie’s club, you will have all your weapons taken off you. Just to the right of the reception desk area, there’s a green bear. Very easy, this one.
CraiggerBear 4: Savali
The Savali craiggerbear is a very easy one to miss due to the sheer size of the map alone. Also, you’re often going to be travelling at high speed which makes it harder still. But it’s actually one that’s very close to a main mission area.
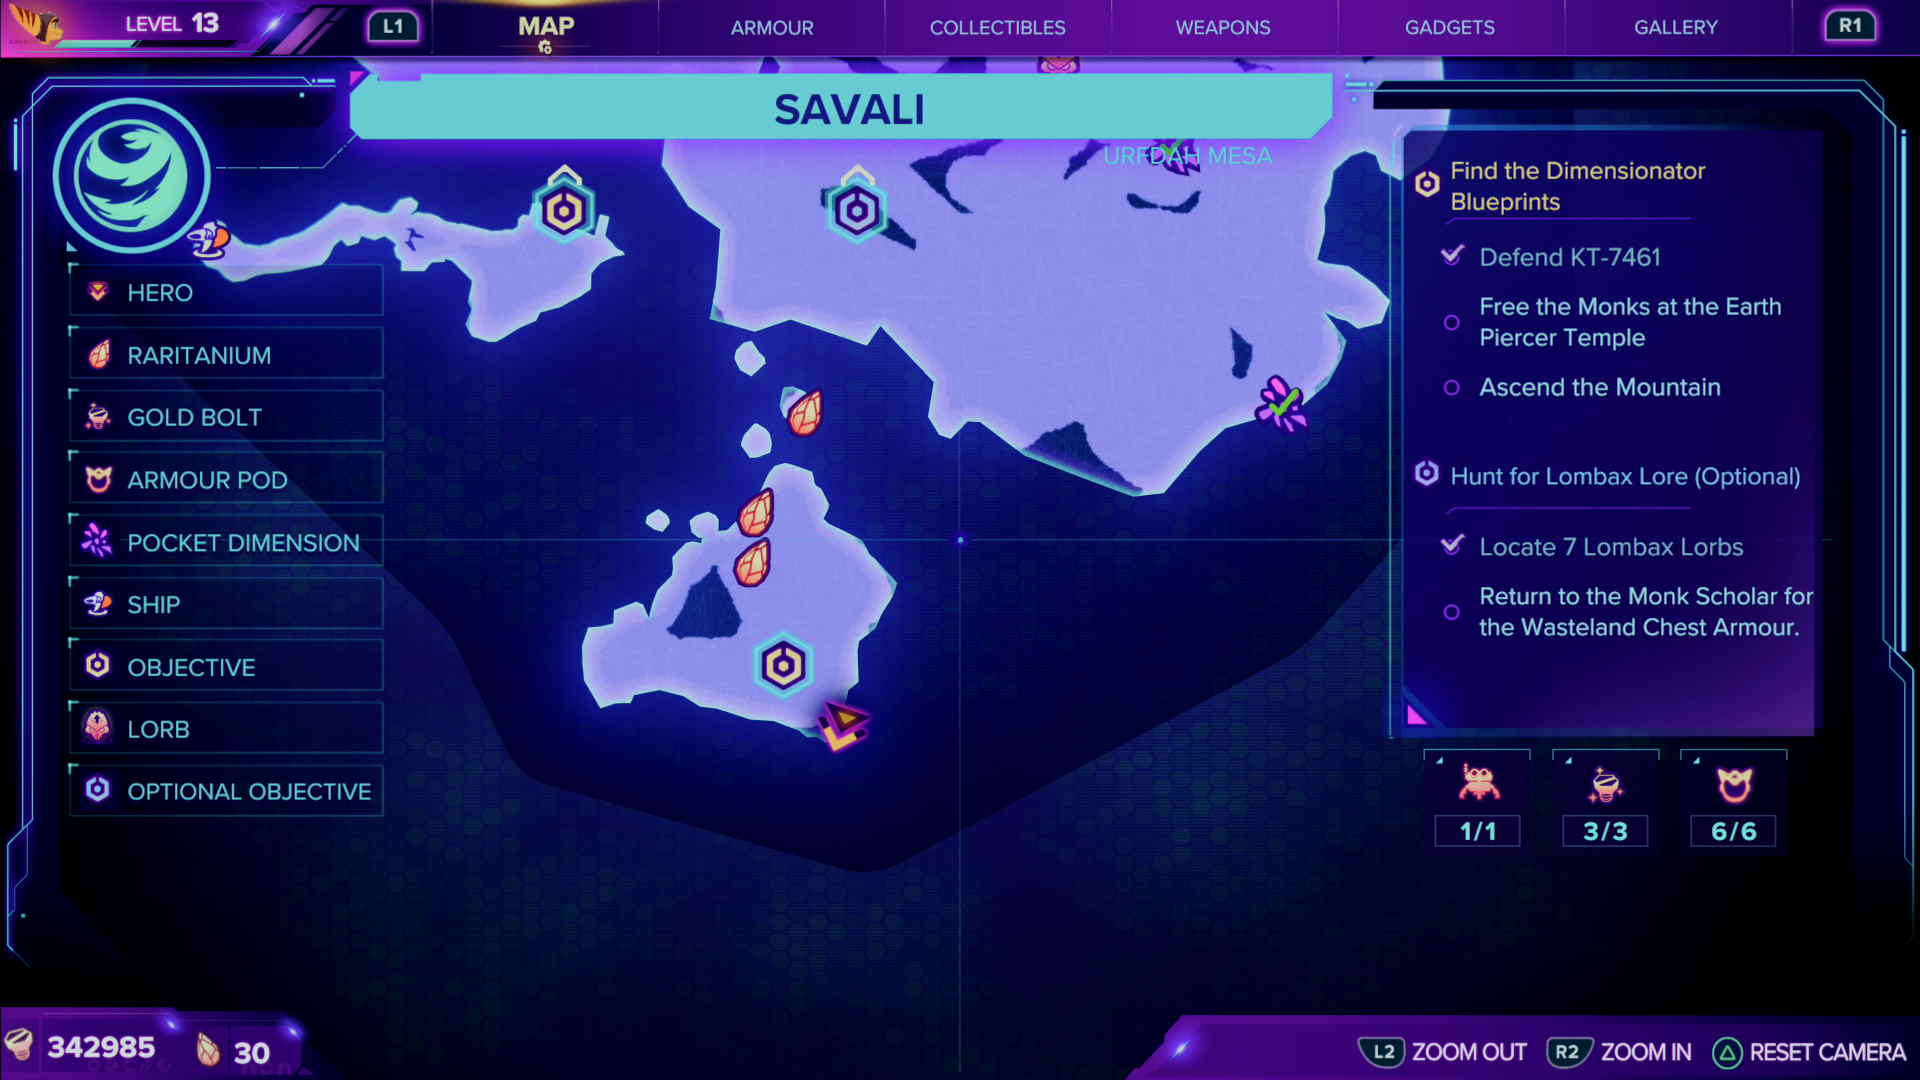
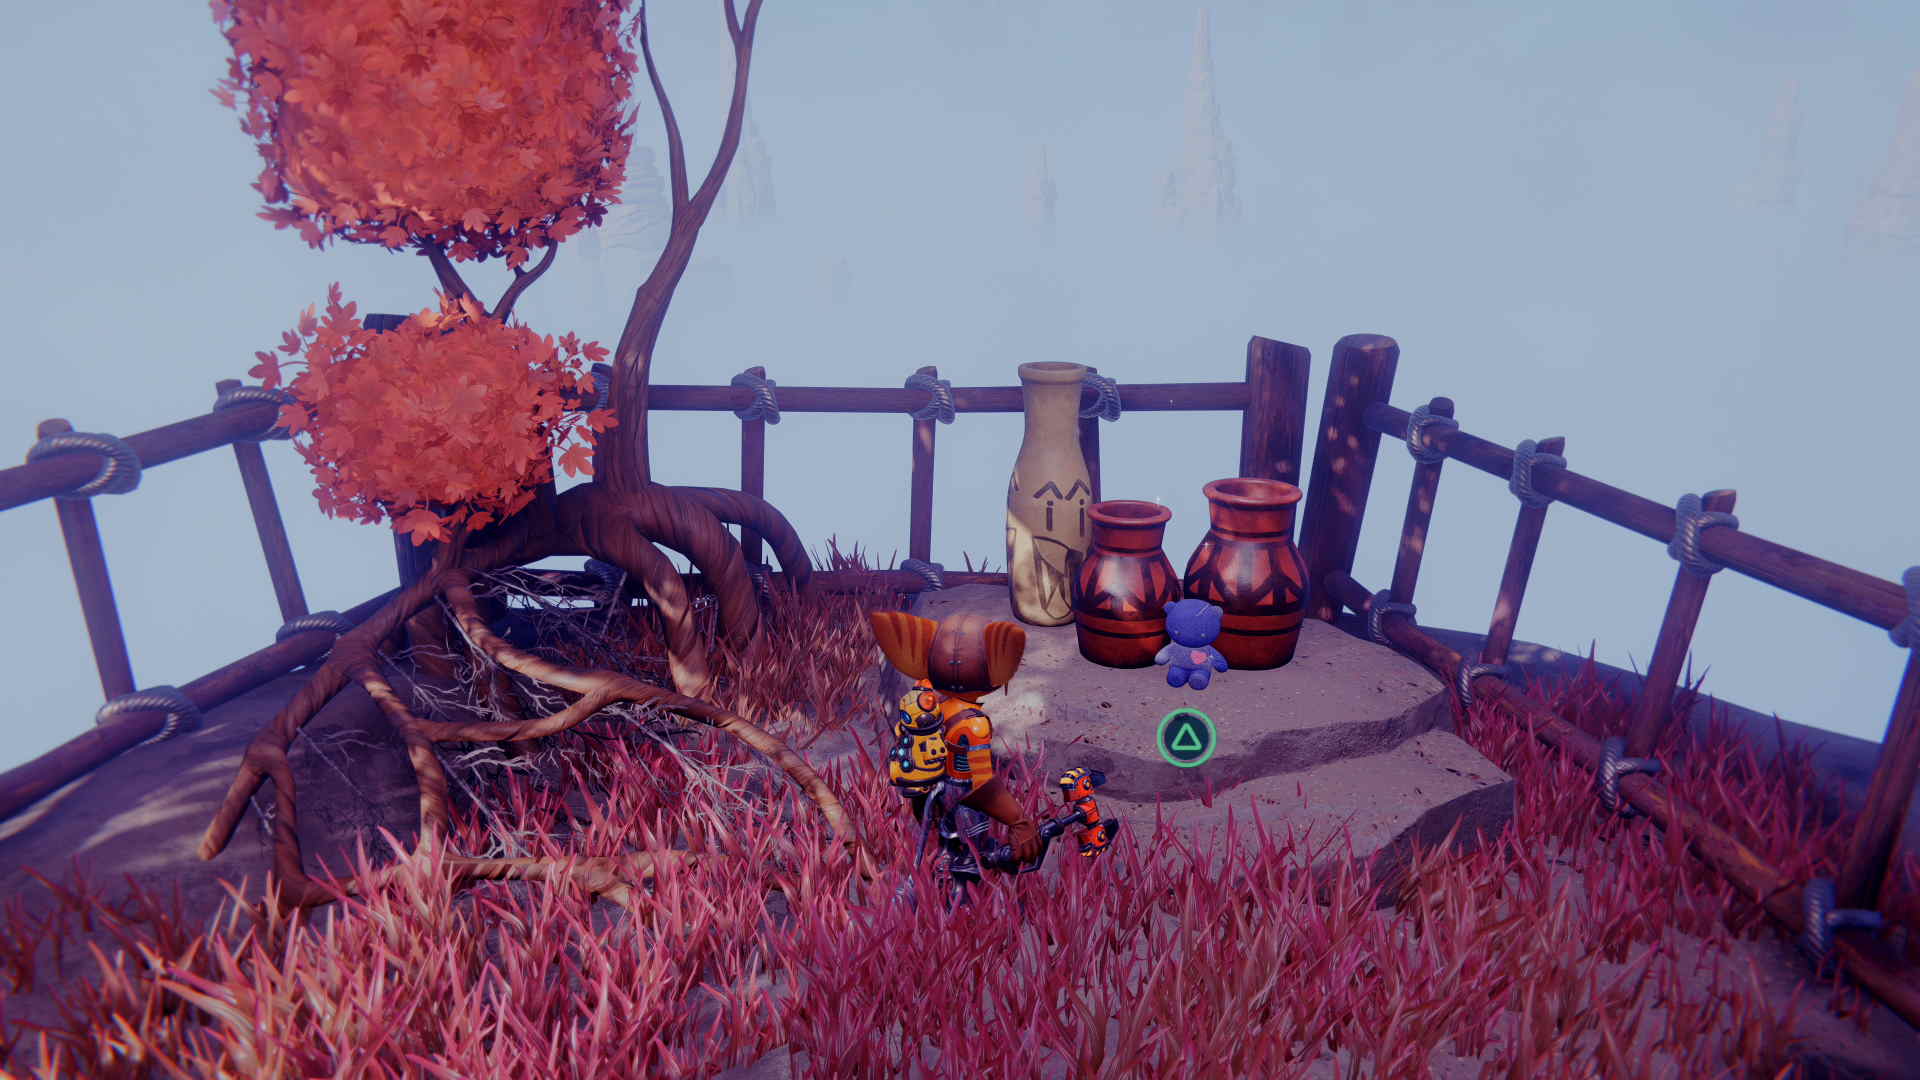
The main mission here is to free the Monks at the temples. At the very bottom of the map there’s a section where you have to race up a mountain. You touch a green pressure pad and a rock floor is revealed. However, after the very first one of these, STOP. You’ll find yourself in the area pictured below.

Instead of continuing onward with the race, veer left and go over the railings. Here you’ll find the blue bear teasing you near some pots, right on the edge of the cliff.
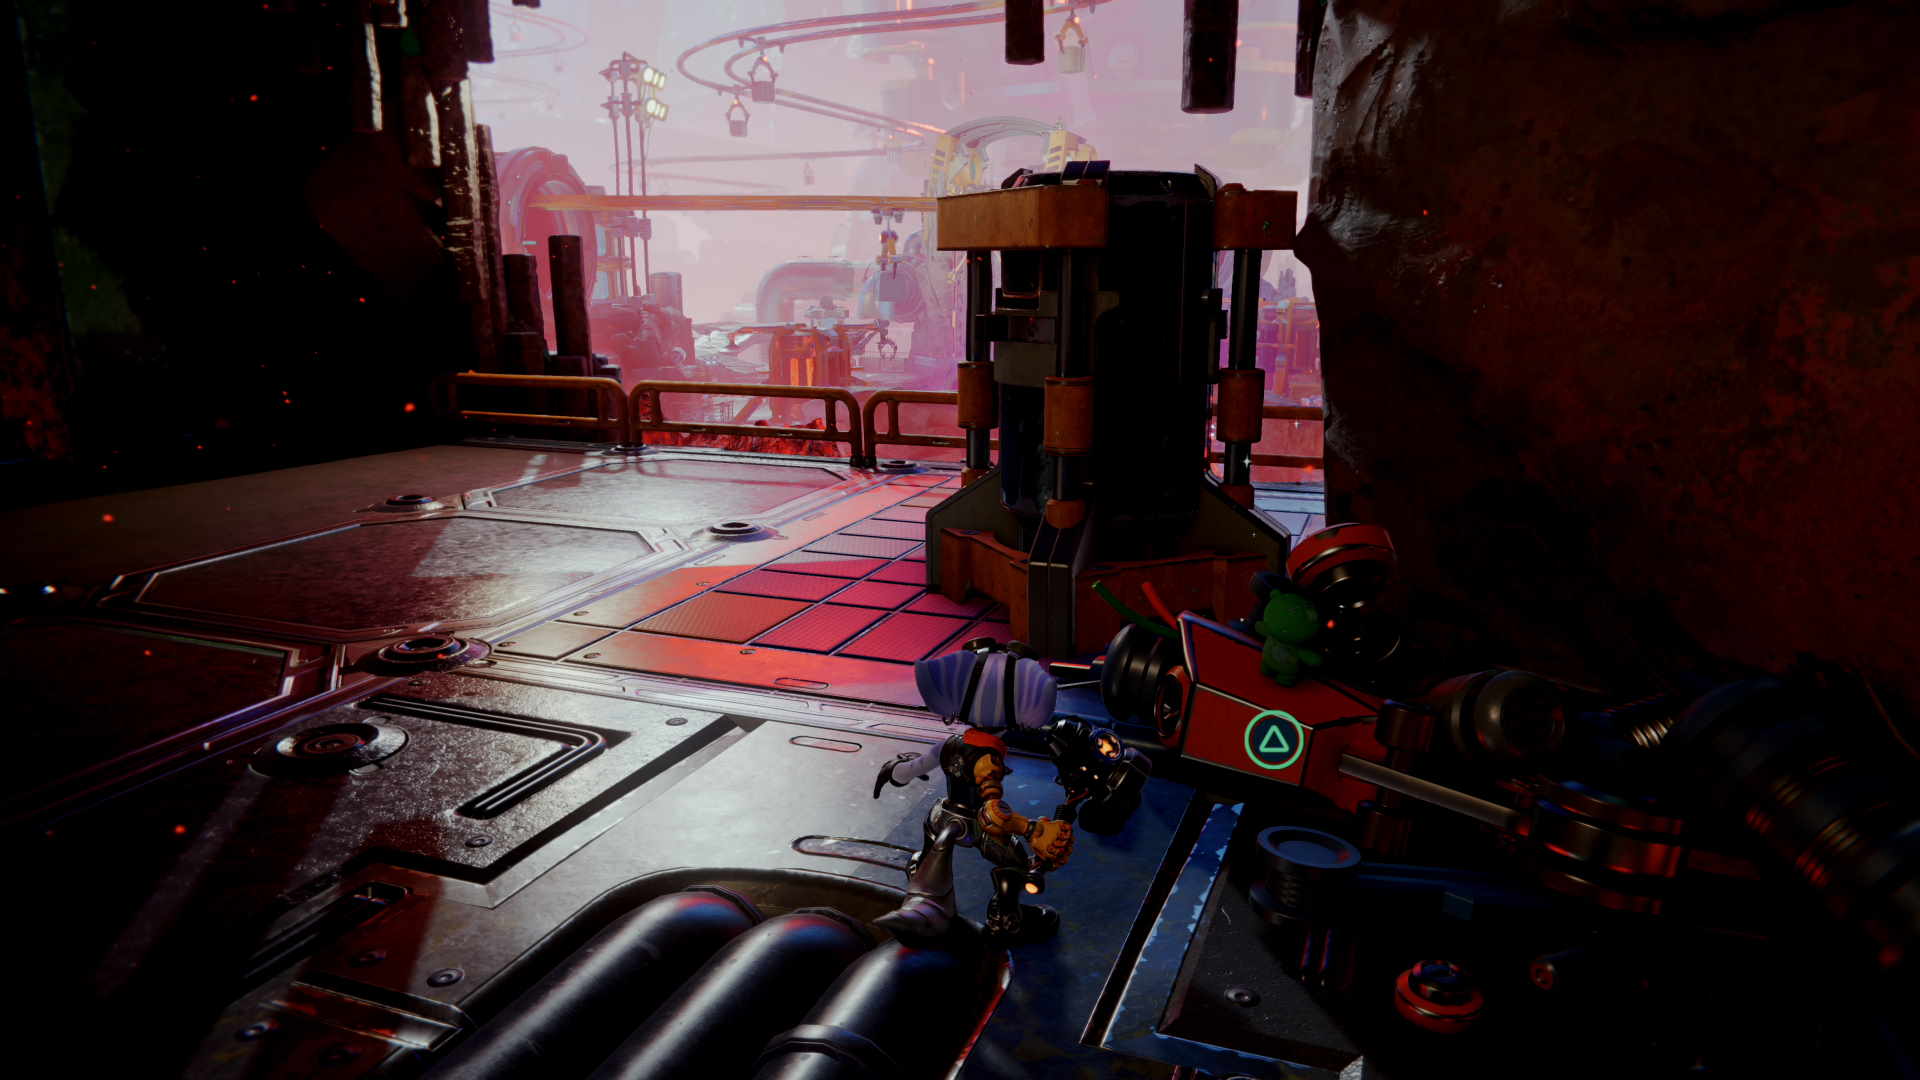
CraiggerBear 5: Blizar Prime
Blizar Prime is a bit of a pain to revisit due to the nature of the Phase Quartz shifting mechanics. Follow the teleporters back and then visit Mrs Zurkon near the bottom of the map. Go to right near where a shifting quartz piece is and you are nearly there.
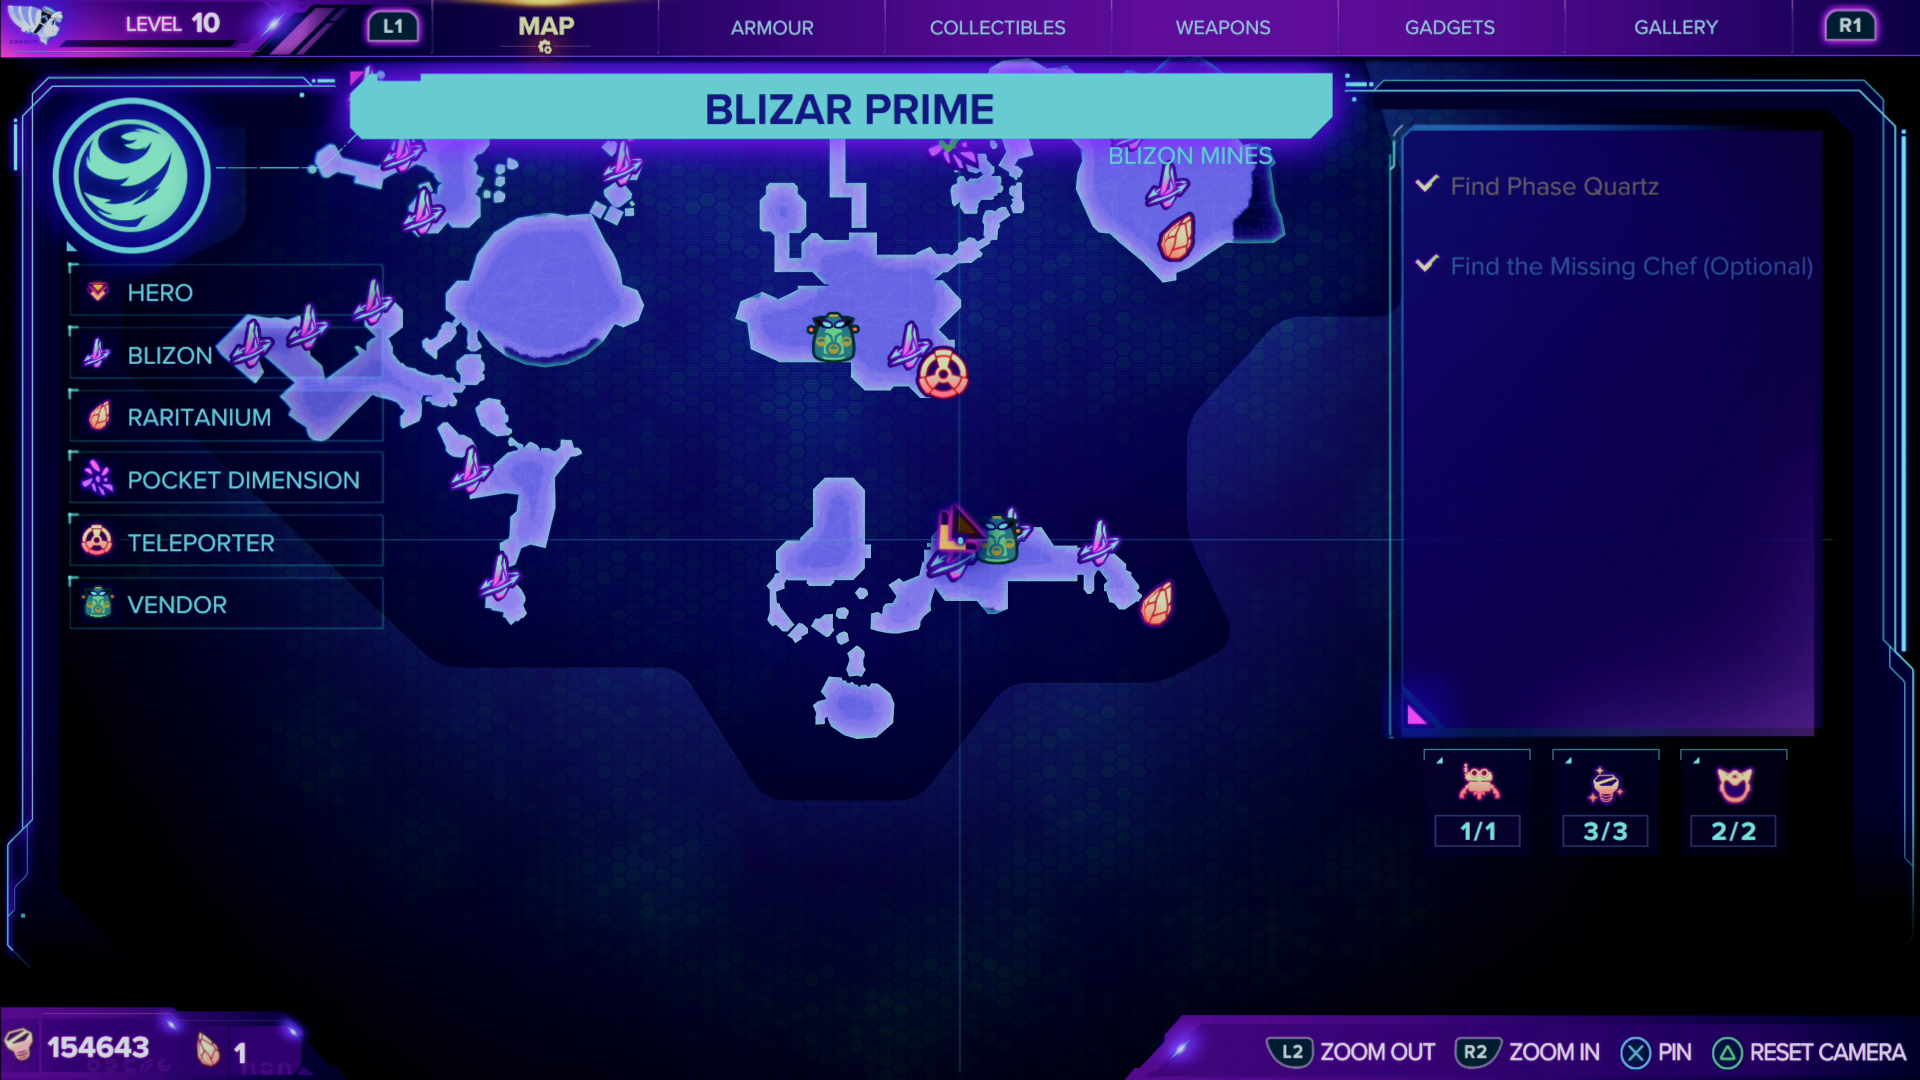
This green CraiggerBear is slightly hidden in the dark on top of some old machinery. But again, it’s not hard to find when you know the correct location.
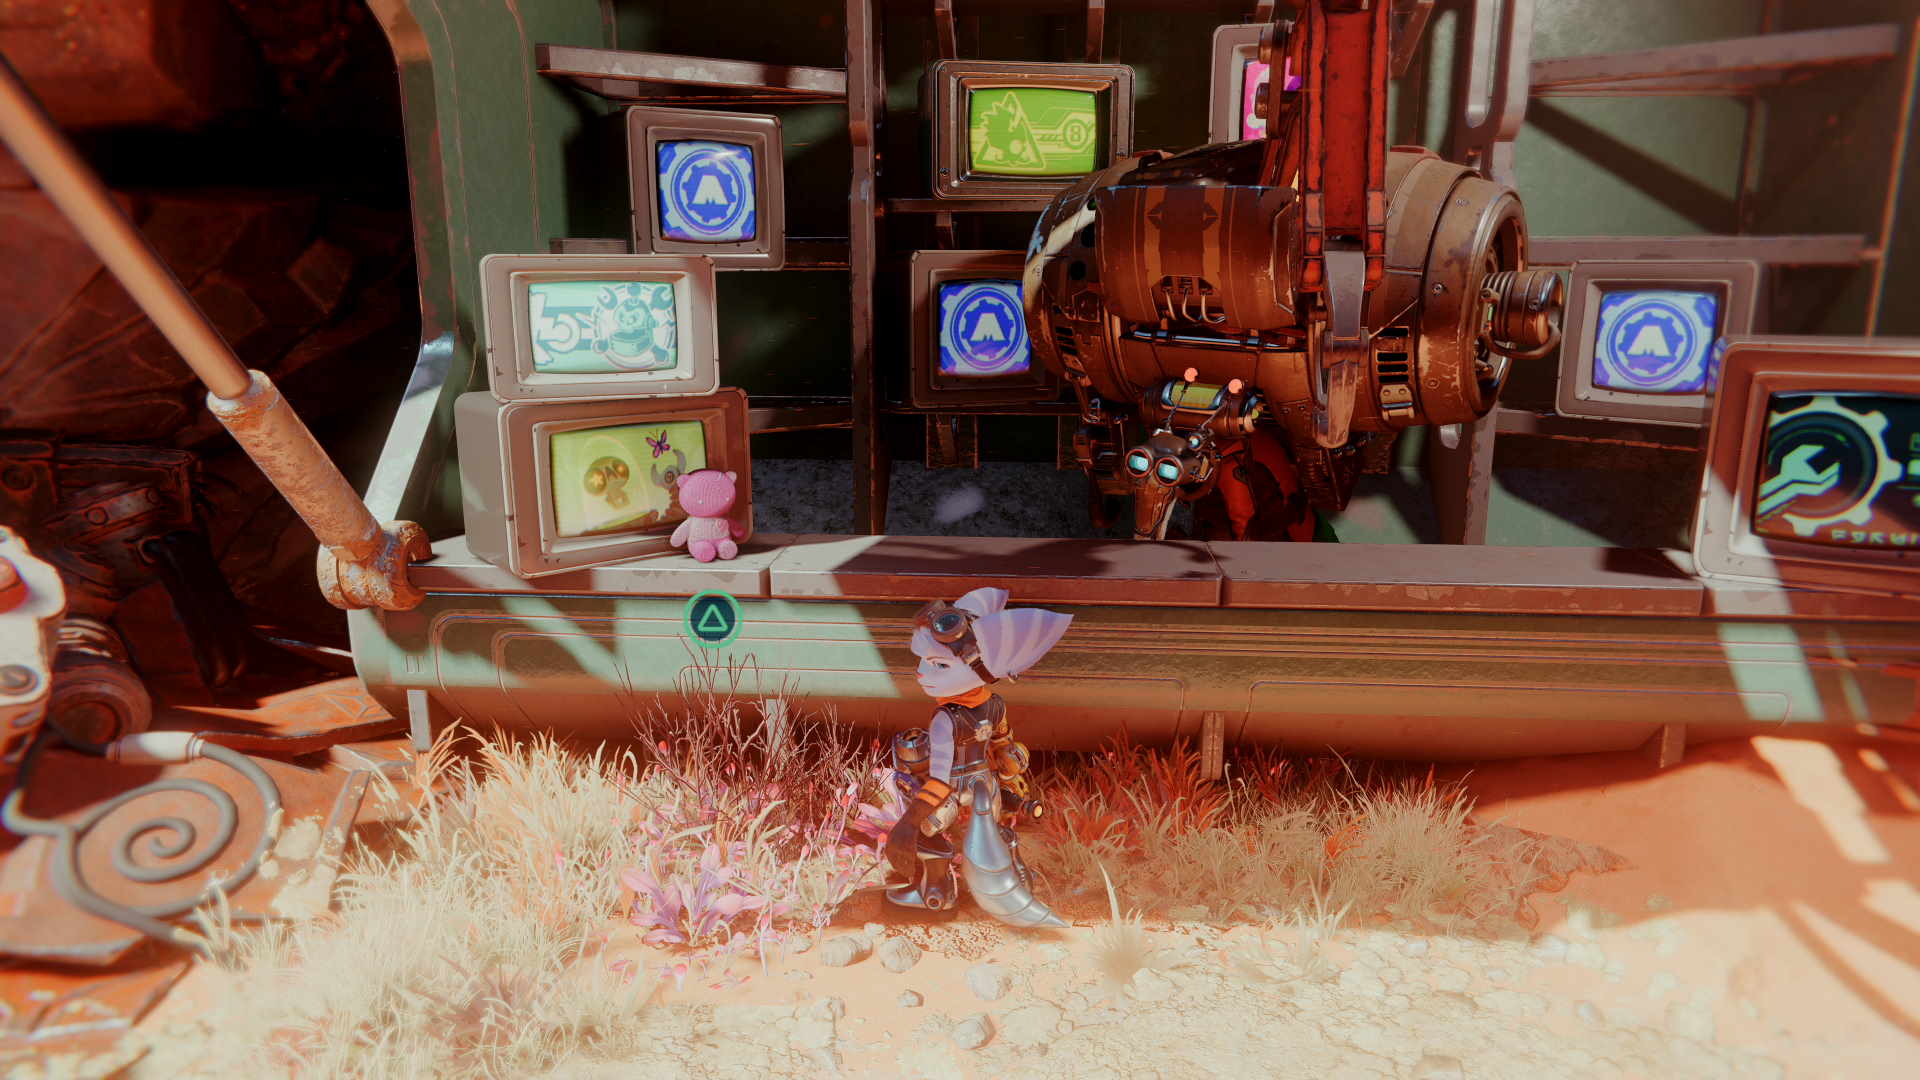
CraiggerBear 6: Torren IV
This is another fairly easy CraiggerBear to grab. If you return to Torren IV after visiting for the first time, you simply need to head back to the town area with NPC vendors.
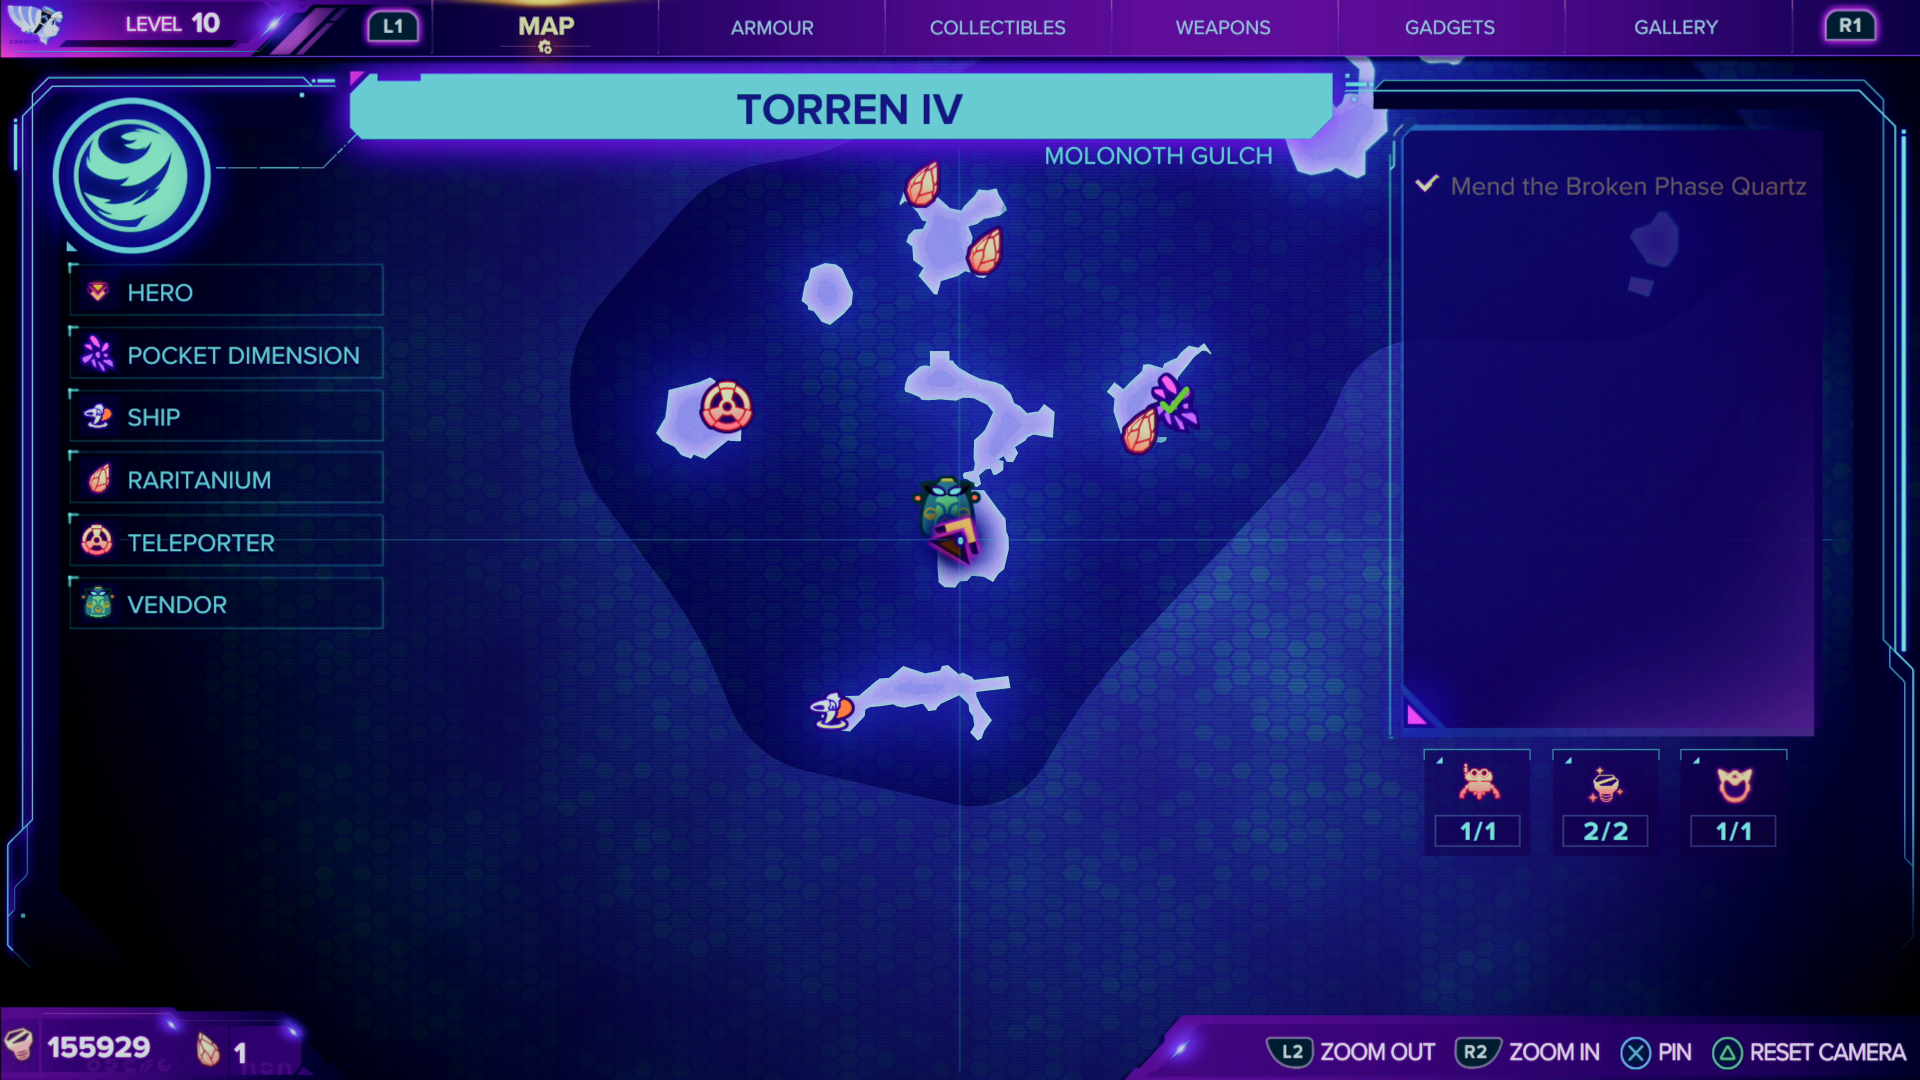
You’ll see the pink bear just sat there on a counter. He’s right in front of a TV screen, next to a massive machine NPC vendor.
CraiggerBear 7: Cordelion
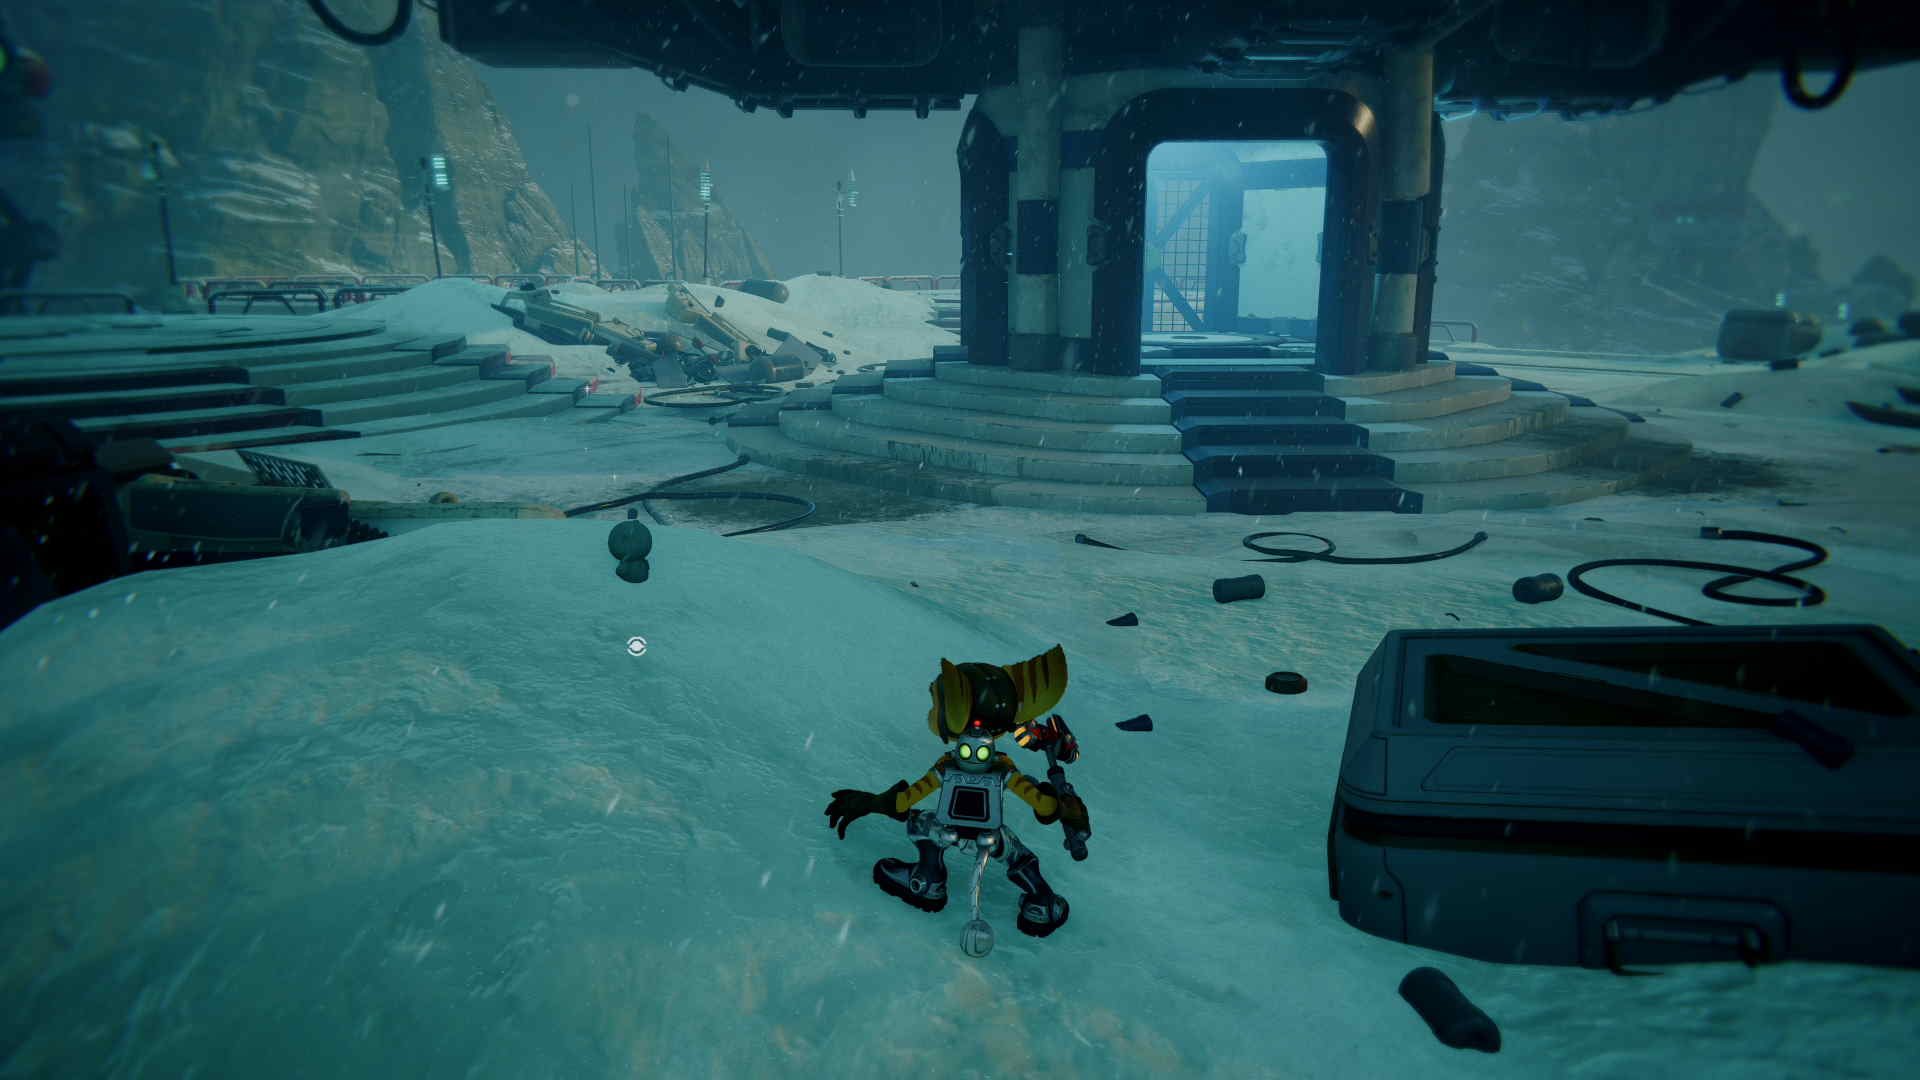
It’s very easy to miss the CraiggerBear on Corderlion. Mostly, this is because you spent much of the planet swapping between dimensions. However, the bear is right at the start of the planet, you just won’t see it at first. Very early on you have to go down a lift, and to do so you need to hit a dimensional quartz and swap to a snowy Winterland.
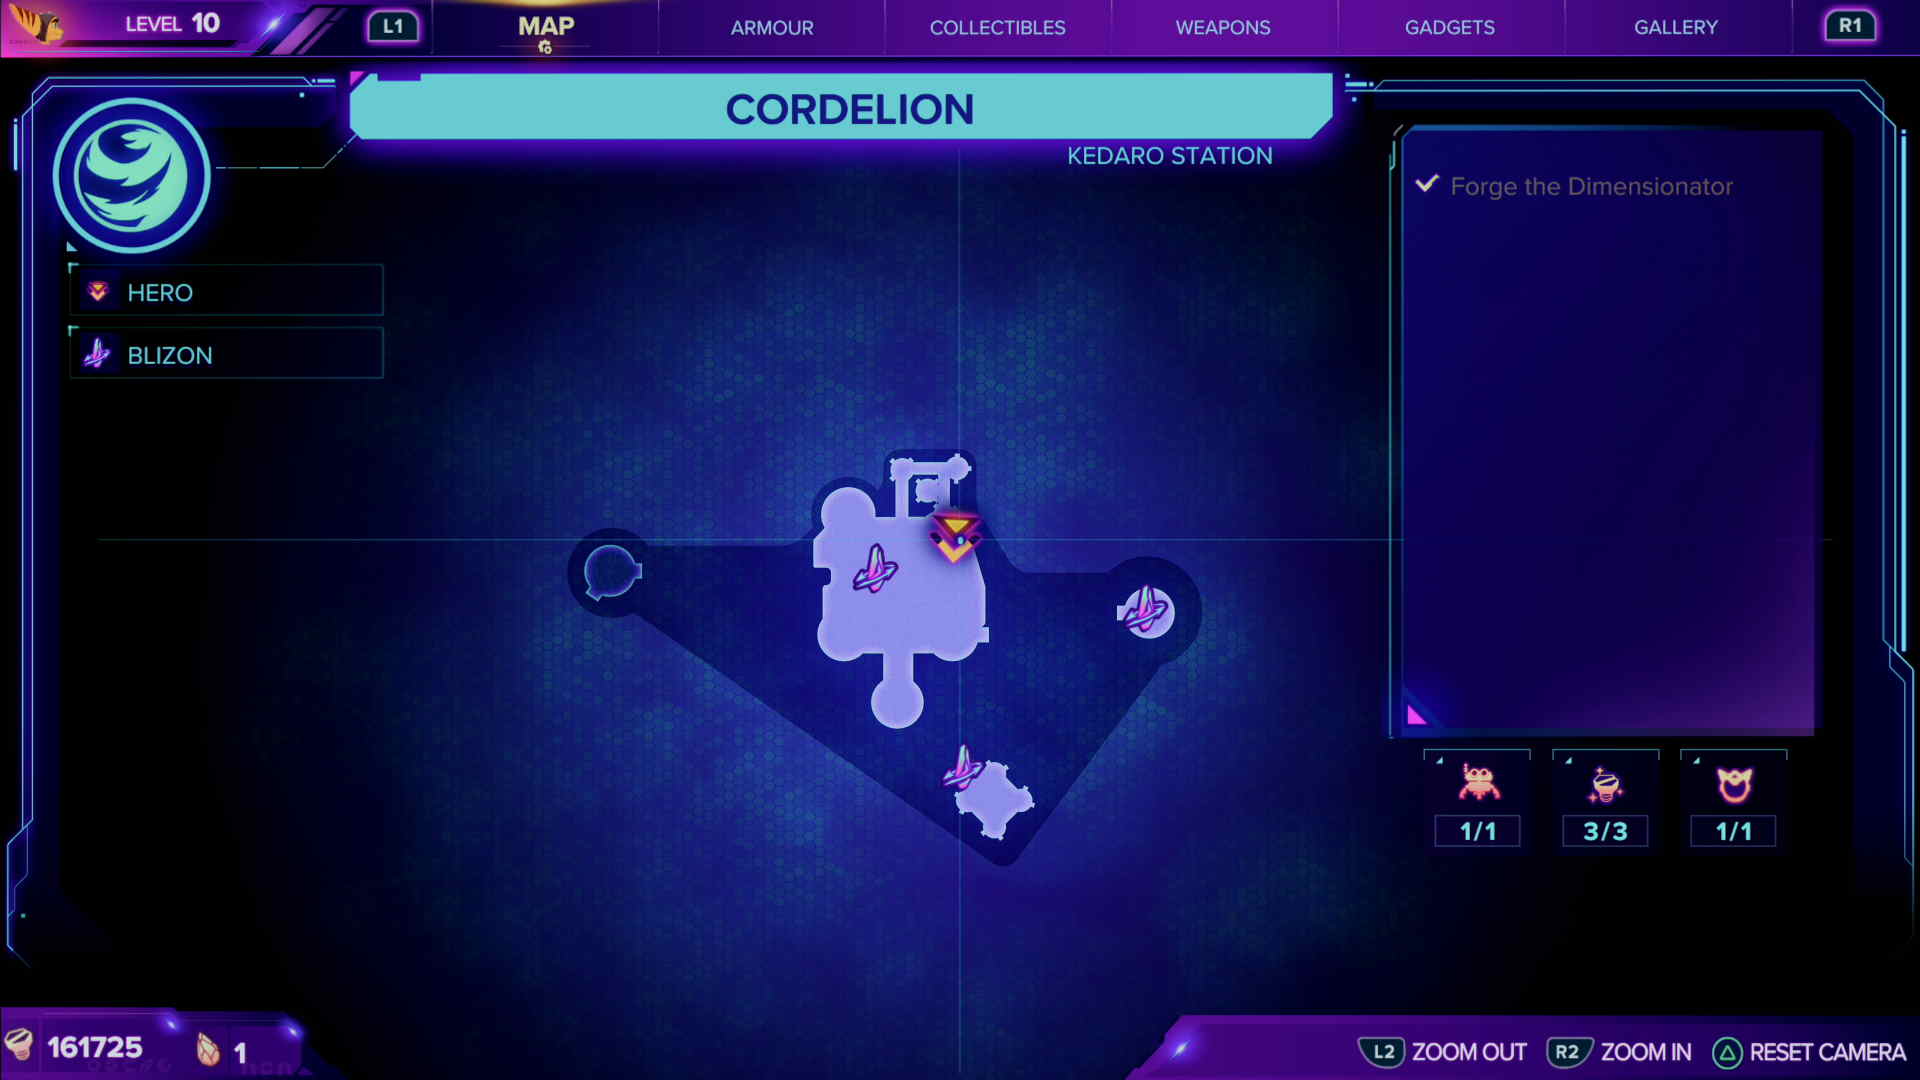
Once you’ve done this, slide back down the snow to where you came from. But DO NOT go down the lift. Just down from the snow slide on the stairs the bear is partially buried in the snow. It’s right near a box that is also buried. You can see the lift from the bear, too. You’re nearly there, one more to go!
CraiggerBear 8: Ardolis
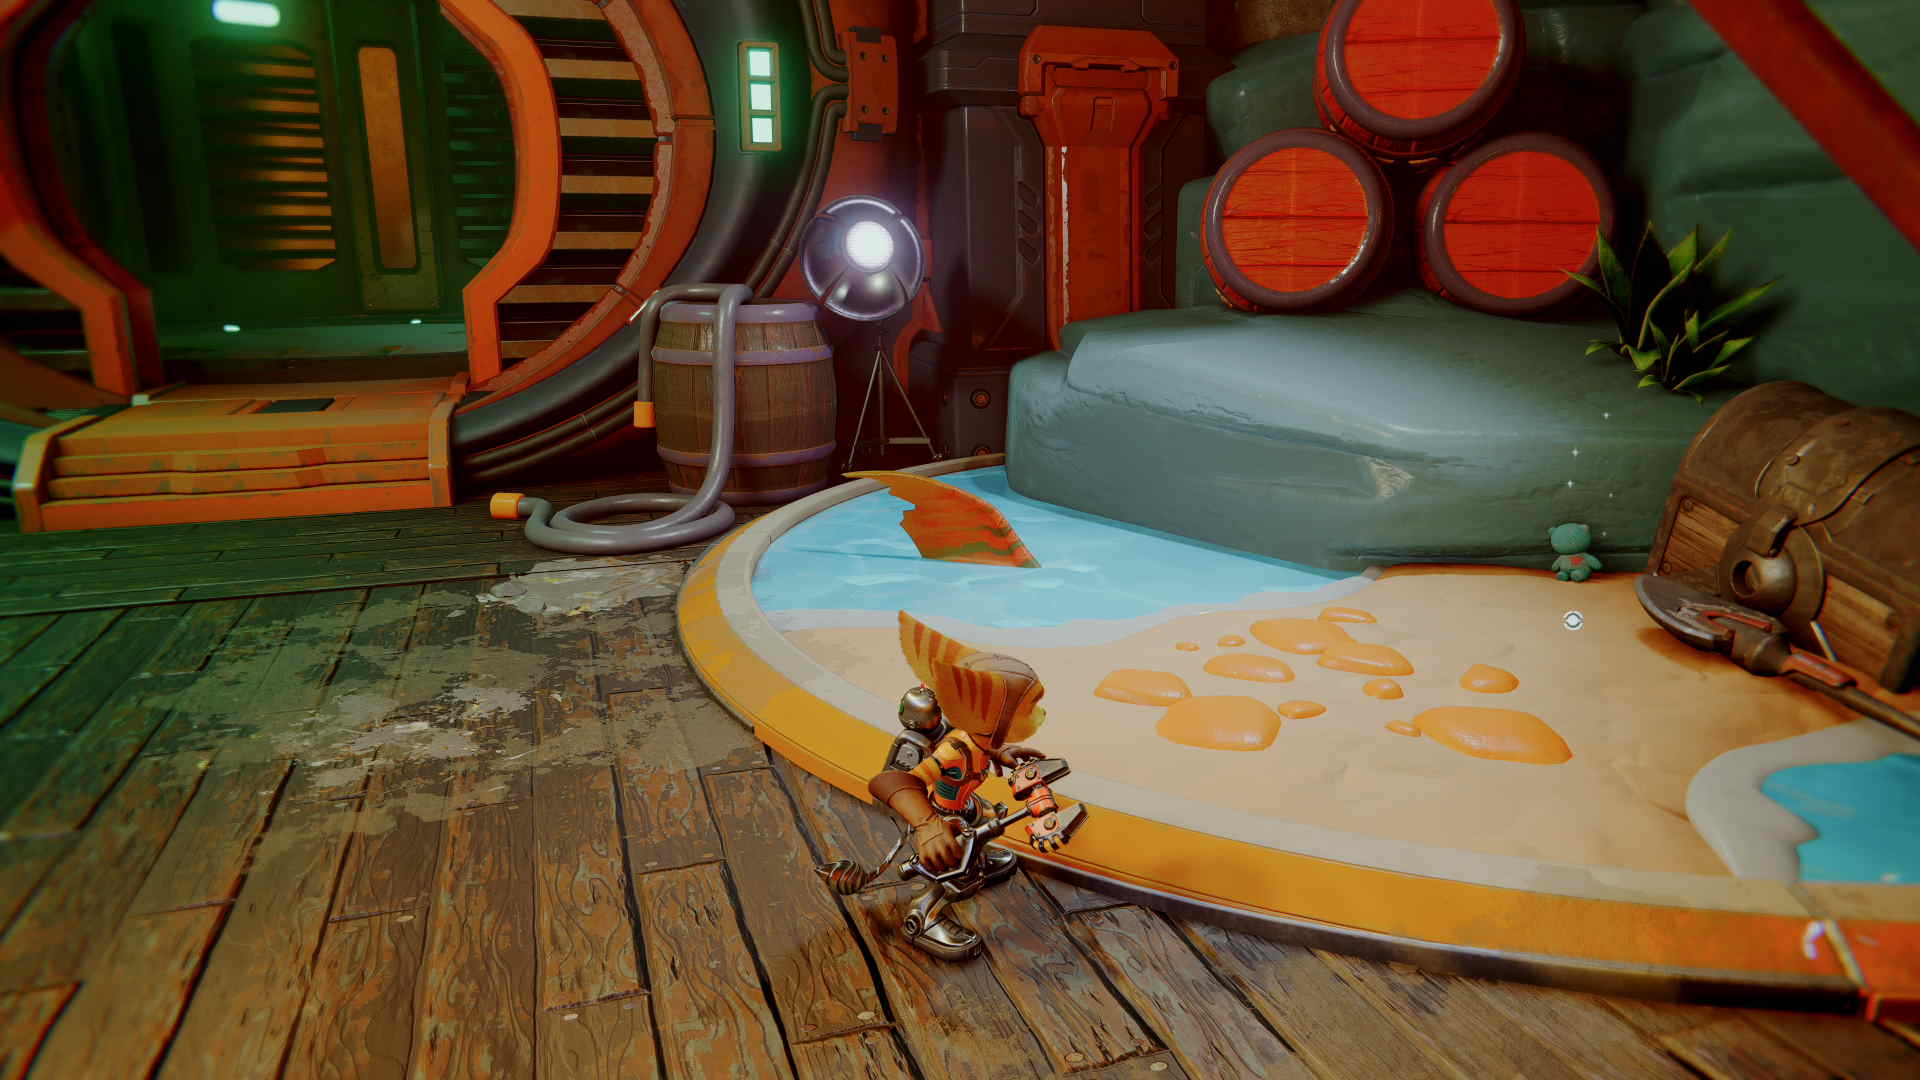
Ardolis hides a CraiggerBear you could miss first time as well. It’s so late into the game you might be rushing through. But there’s pirate trials on this planet, and that’s where the bear is hidden. Luckily you don’t have to pixel-hunt through the trials, just rush through to the end, right to this point.
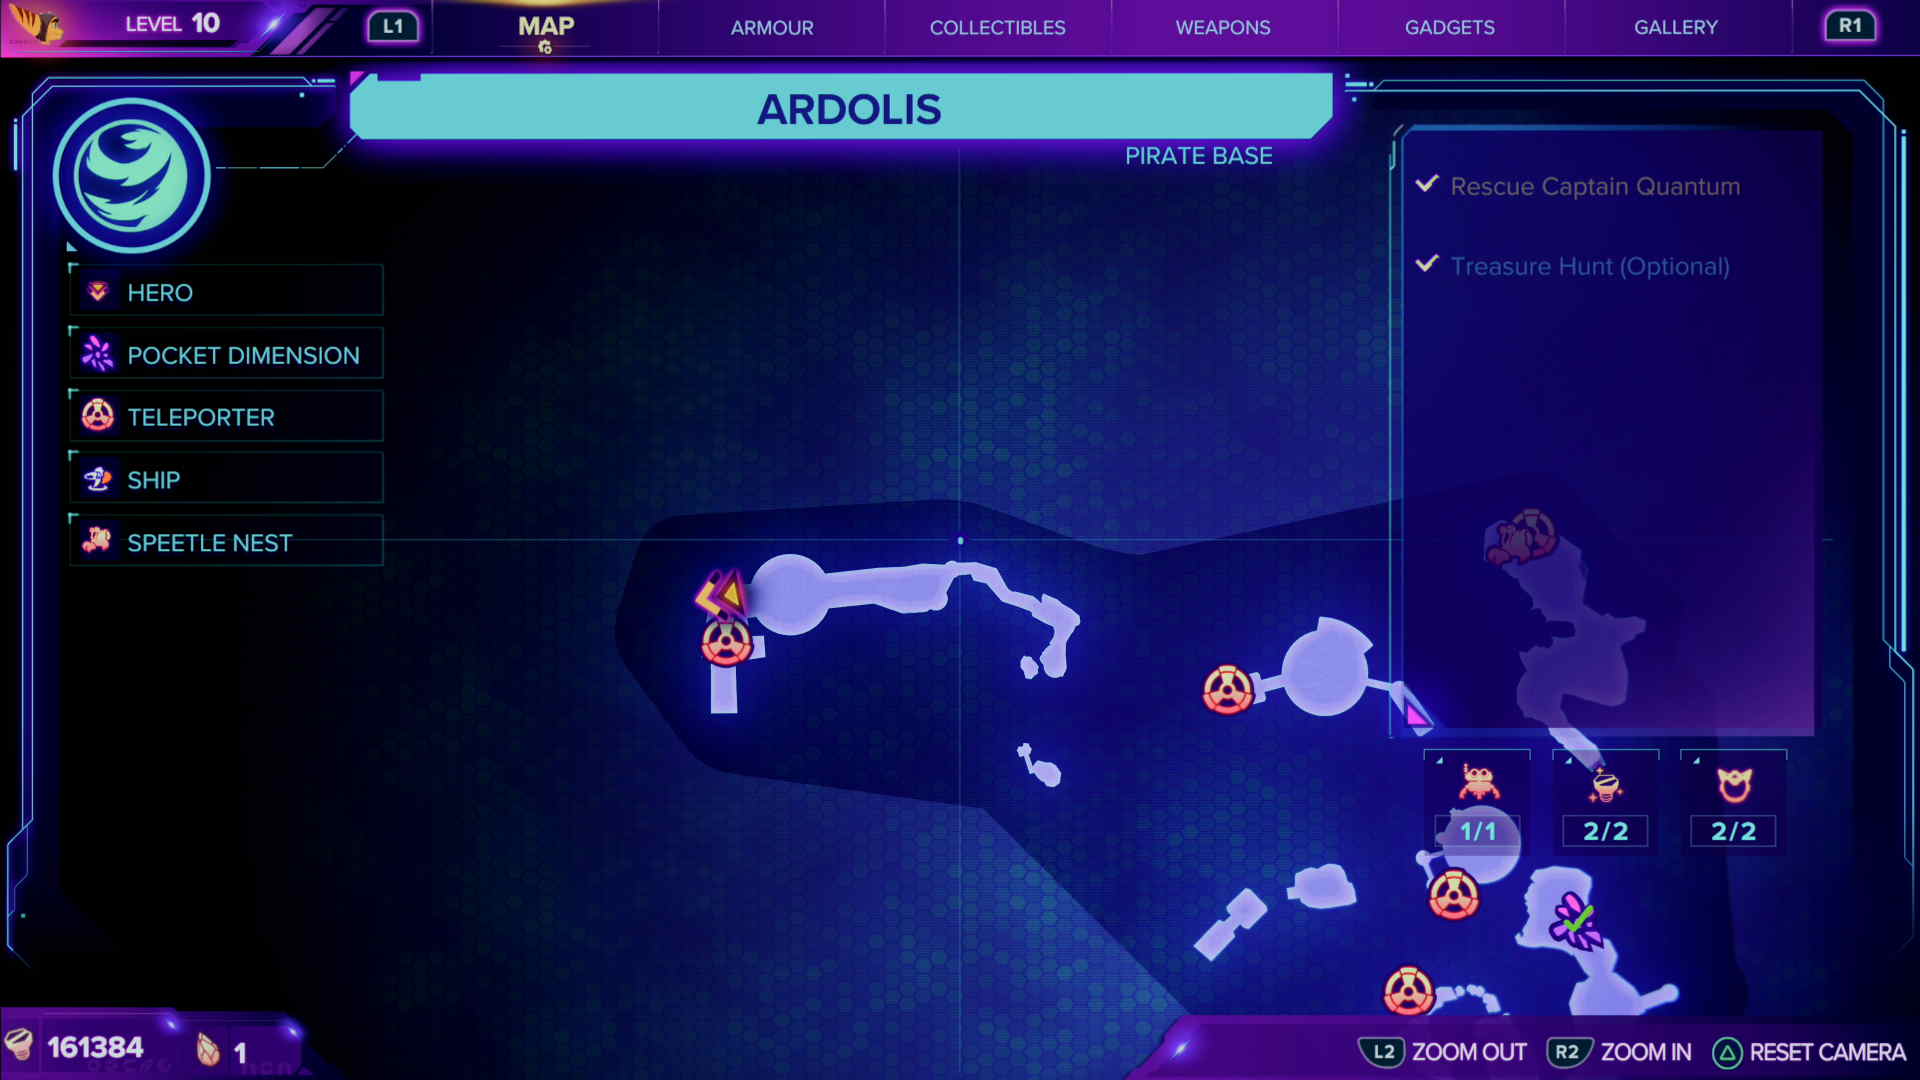
Before you take the lift out of the area, just after the vendor, the bear waits in hiding. It’s right by a treasure island, of sorts, next to a treasure chest. Grab it, then take the lift so you can warp back to your ship to continue your hunt.
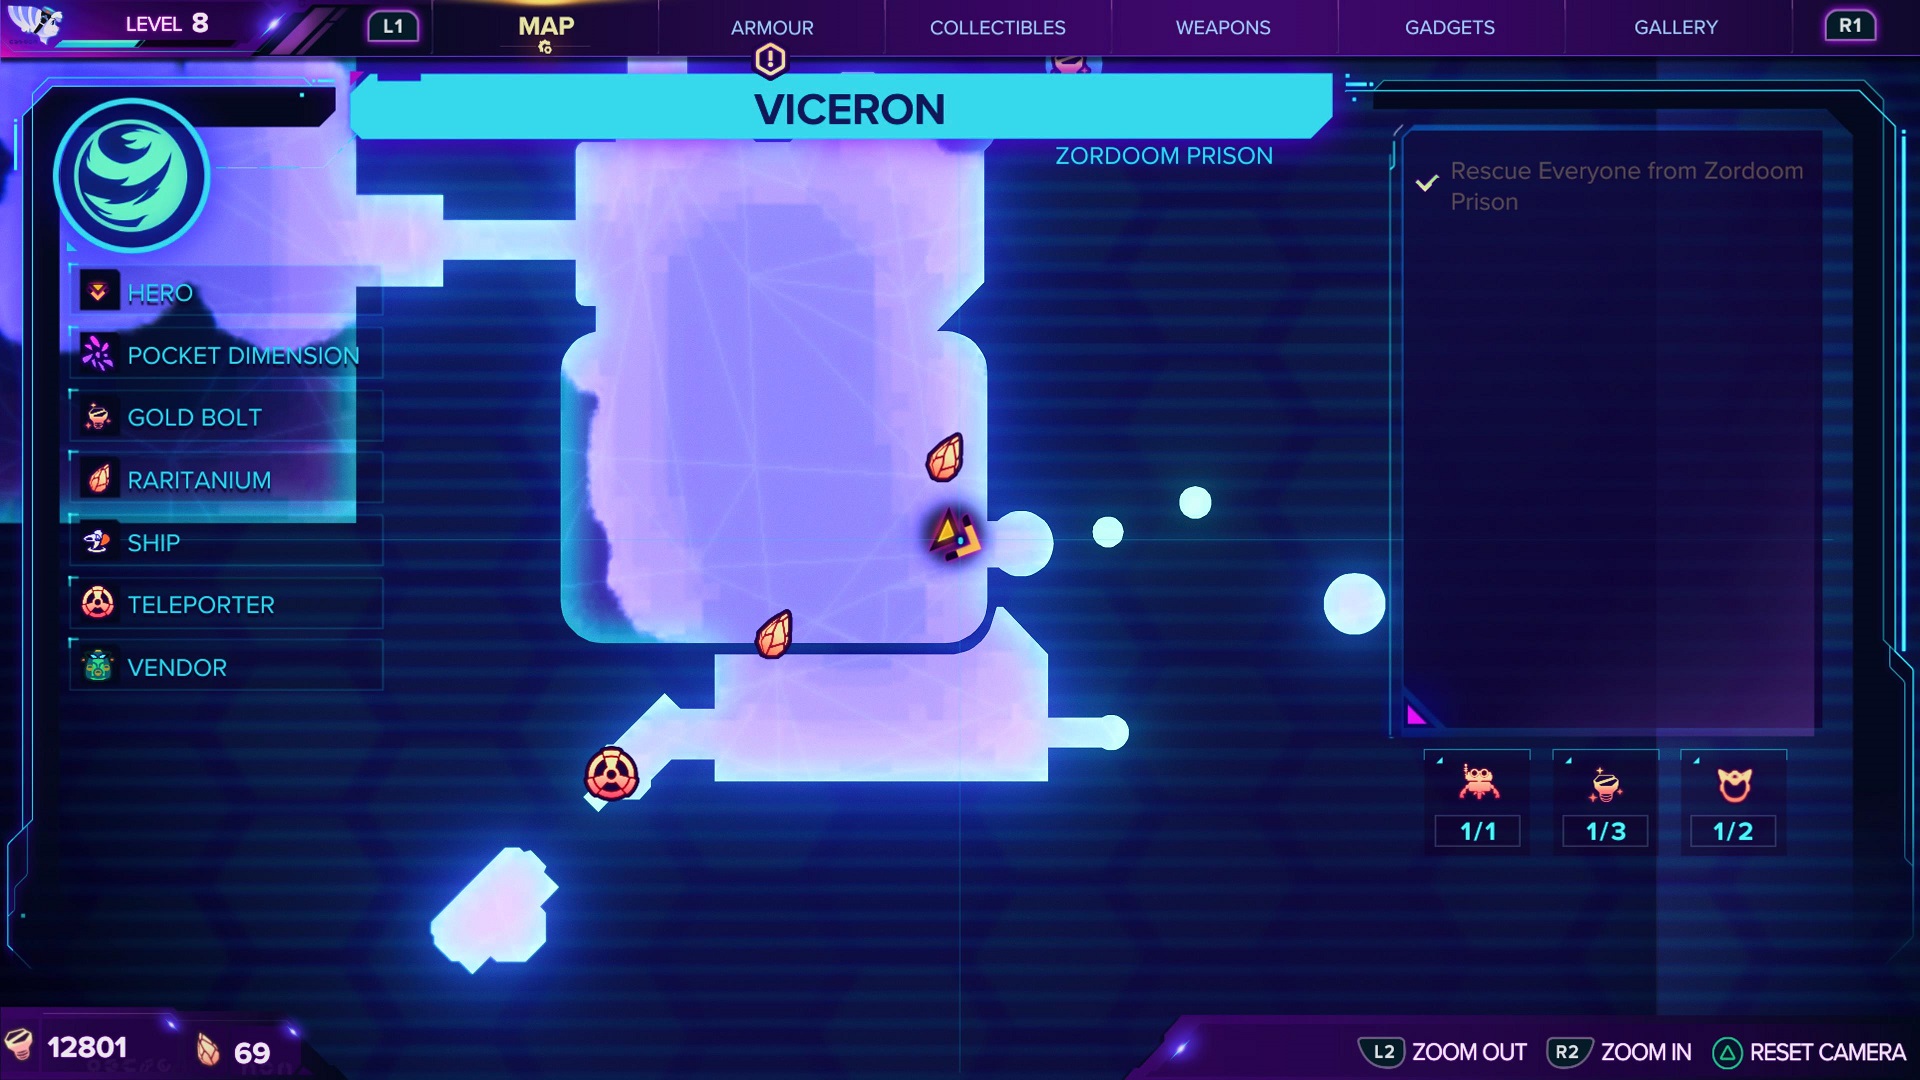
CraiggerBear 9: Viceron
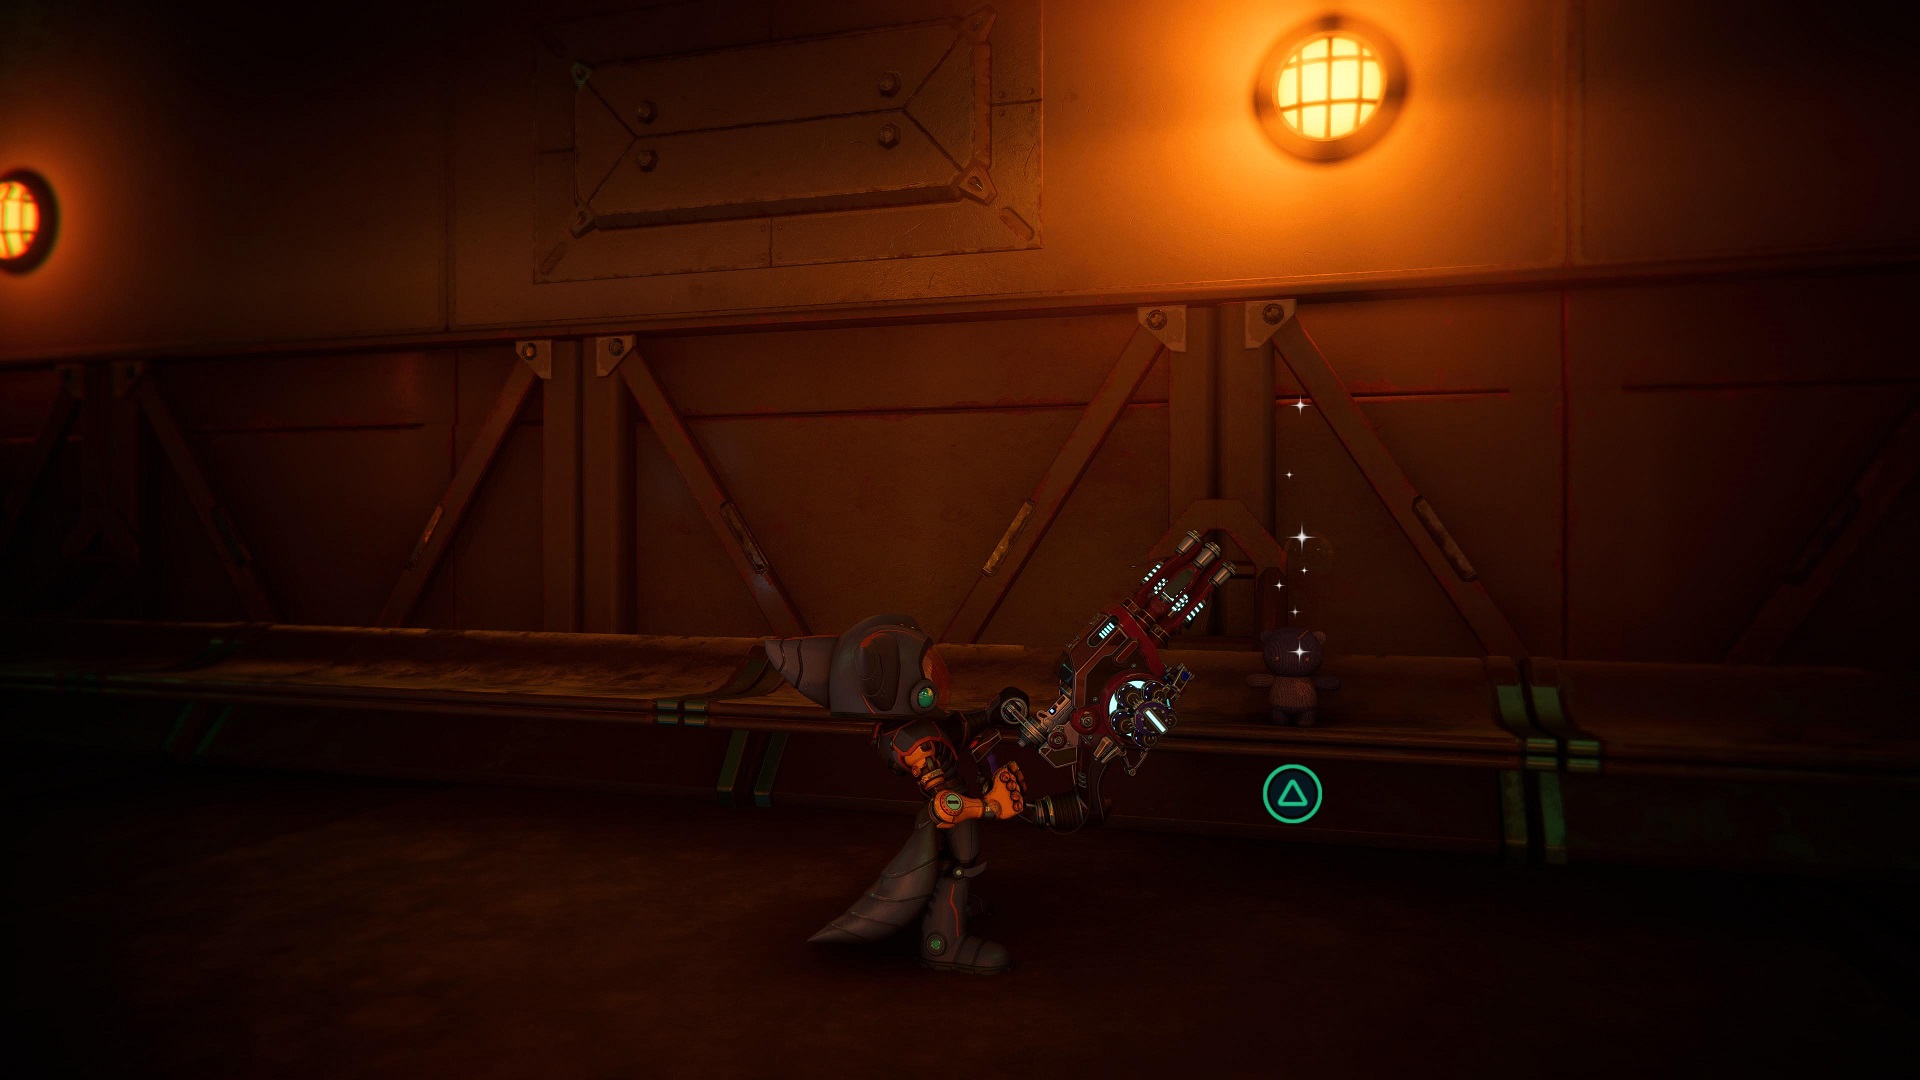
Viceron is a planet where a lot happens in a very quick manner. But when you do find the prison cell area, you might even be able to see the CraiggerBear behind bars. There’s an interactive crank nearby that will open the prison cells, make use of that, and you’re nearly done.
Once you’ve open the cells you will find the last CraiggerBear sat on the long bench. The poor love is a prisoner too, so quickly rescue it and you’ve just got the last bear on your list.
And that’s it. You found all of the Ratchet & Clank: Rift Apart CraiggerBears, and hopefully you also just popped the 100% trophy. That’s a platinum in the bag, folks! Make sure you follow us on Social Media and Subscribe on YouTube to never miss a new feature. Check out our Guides section for all manner of help on Rift Apart. We can help you get the platinum, for sure.