How to Draw a Realistic Wolf Step-by-Step for Beginners
Drawing shapes, people and even animals isn’t as hard as it seems because, just like in math, one can follow some neat patterns and create the perfect body shape, head, toes, and every other detail.
This article is a basic wolf drawing tutorial that will teach even people that never had anything to do with art and drawing the basics of drawing a realistic wolf. Just follow the steps and don’t be afraid to make mistakes; it’s what makes every process perfect!
Building the Foundation: The Basic Framework
Are you wondering whether to start with the head or the torso? The foundation is the basic few lines that start each drawing. And the thing about foundation is to always draw as lightly with your pencil as possible.
We will insert a few basic steps to clearly point out what you should do.
Step 1: Create a Skeleton Outline
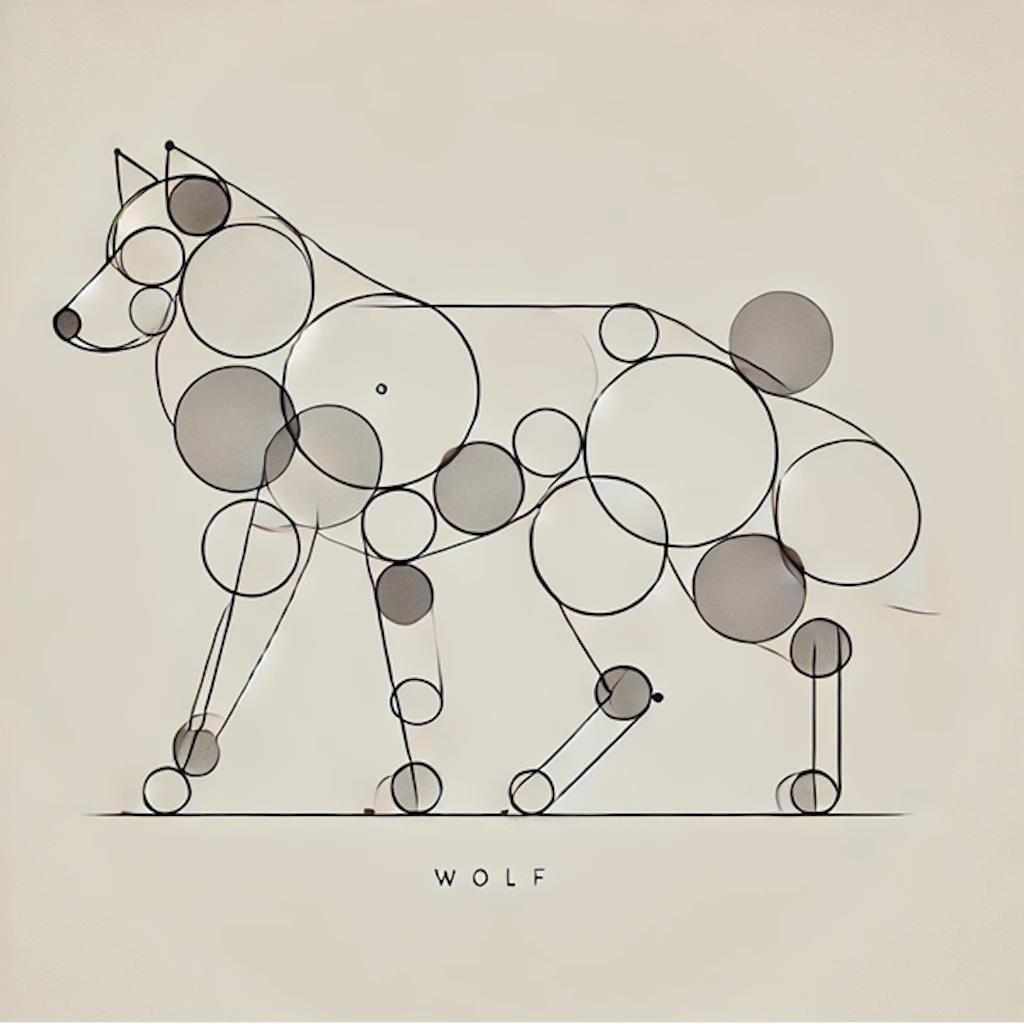
The first step of drawing a solid framework is sketching an oval for the head.
Every well-drawn wolf starts with a solid framework. Begin by sketching an oval for the head, and a bit larger oval for the body, which is the ratio of around ⅓ of the head. Mark the joints with smaller circles (placing each circle at the shoulder and elbow of each leg, so that would make 8 of them, depending on the positioning of the legs).
Lastly, just draw a simple curve for where the tail should be.
Step 2: Connect the Shapes
Once the basic geometric lines are on paper, use smooth and italic-placed lines to connect each one, to create what would appear to be the wolf’s figure finally.
First, you should connect the head to the torso with a thinner neckline. Then, draw a soft arc to link the torso with the shoulders and the legs.
You have the freedom to do different variations here, depending on the wolf’s posture you are drawing (standing at all fours, laying back, etc.).

Shaping the Head
This step is about “breathing life” in all shapes of your wolf drawing.
Step 3: Define the Head’s Shape
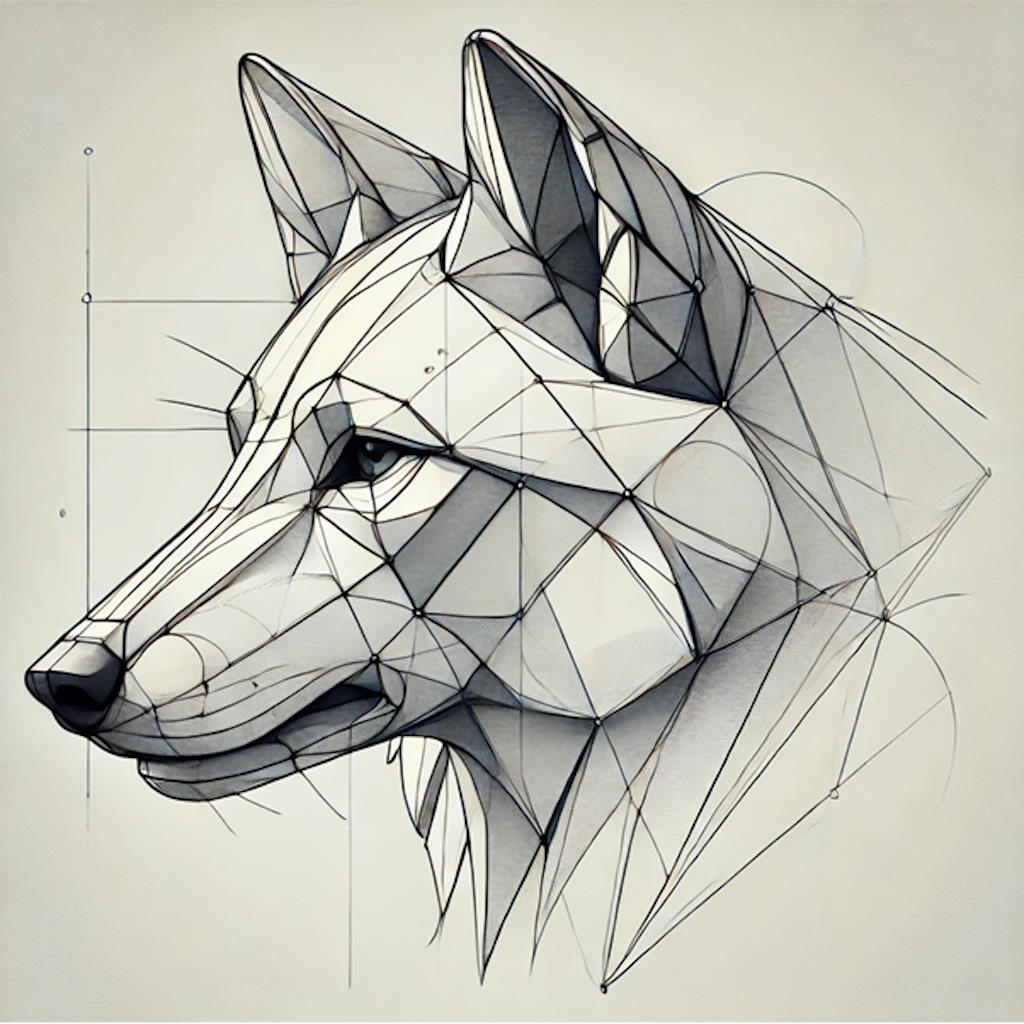
First of all, start with refining the head’s oval into the distinctive shape of a wolf’s face, or to explain it more easily, turn the oval into a pointed snout.
Wolves have pronounced jawlines, so angle the sides outward a bit as you move toward the jaw. Finalize the skull by adding a gentle curve at the top.
Step 4: Add Facial Features
A wolf’s expression brings its character to life, because animals, too, have emonitons.
Start by marking light guidelines for the eyes, nose, and mouth. Position the eyes slightly above the oval’s center, drawing almond shapes that tilt outward for an alert look. For the nose, sketch a rounded triangle at the snout’s tip, adding two small ovals for the nostrils.
Draw a subtle, downward curve below the nose for the mouth, giving the wolf a calm, neutral expression. To show depth, include faint lines around the eyes and snout to suggest muscle and bone structure.
Step 5: Shape the Ears
Wolves’ ears are tall and triangular but slightly curved at the edges for a natural look. Draw two triangles at the top of the head, angling them outward. Inside, add short strokes to suggest fur. Around the base of the ears, sketch fluffier fur to blend them into the head seamlessly.

Refining the Body
Moving on to doing similar steps as the head with the body, here you will learn how to refrain from the body of the wolf like a pro.
Step 6: Shape the Torso
Focus on refining the body’s contours. From the neck’s base, draw a curved line outward for the chest, then taper it gently as it moves toward the hips. The back should arch slightly to emphasize the wolf’s lean, athletic build. Make sure the body matches the proportions of the head.
Step 7: Sketch the Front Legs
Use your skeleton lines as a guide for the front legs. Start at the shoulder, curving down to the elbow, then extend further for the lower leg. Wolves’ legs are long and slim, so keep the lines sleek but add subtle curves for muscle definition. At the bottom, draw oval paws with faint lines to separate the toes. Ensure the legs look proportional and strong.
Step 8: Draw the Hind Legs
The hind legs have a more pronounced bend. Start at the hip, curving the line down to the knee, then angle it back toward the ankle before extending it downward. Add the lower leg and paw, paying attention to the natural angles. Include faint muscle lines near the joints for a realistic touch.
Shaping the Tail
This is step 9, where you should add balance to the wolf’s figure. Draw a flowing, curved line from the back to guide its shape. Wolves’ tails are bushy but not overly fluffy. Add volume with soft, uneven pencil strokes, varying the fur length slightly to make it look natural.
Adding Texture and Details
This step brings your drawing to life.
Step 10: Create Fur Layers
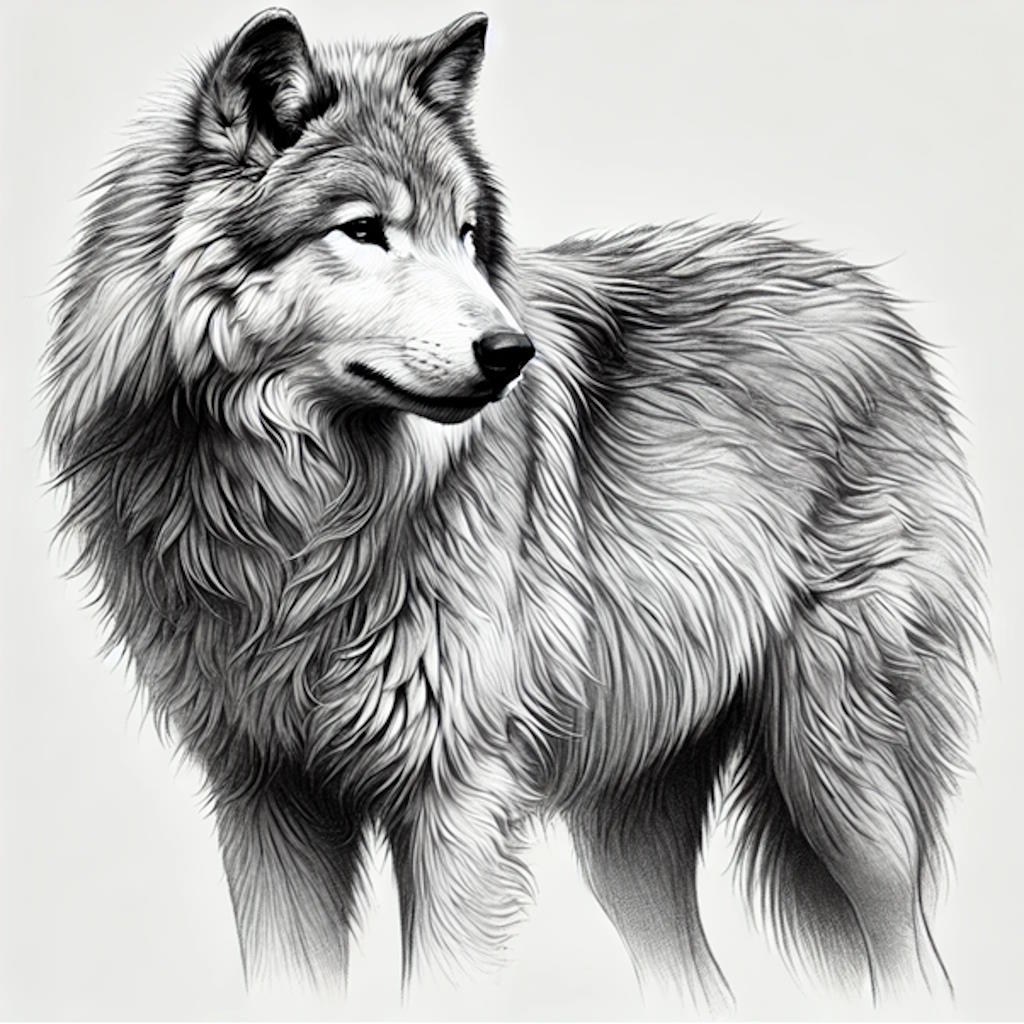
This step brings your drawing to life. Use quick, light strokes to create fur texture. Around the head and neck, draw longer strokes to mimic the thicker fur in these areas.
Use shorter strokes for the torso, blending them to achieve a smooth transition. Pay close attention to the fur’s direction—it flows toward the tail on the back but spreads outward on the chest.
Step 11: Add Shadows and Depth
Shading gives your wolf dimension. Shade lightly under the jaw, along the torso’s sides, and beneath the legs to show shadows.
Blend the shading gently for a natural look. Add darker tones near the eyes and nose to emphasize these features. Highlight areas like the snout’s edges and the tops of the legs to make the drawing pop.

Polishing the Drawing
Take a moment to review your work and make the tiny detail changes that really count for the whole.
Step 12: Final Refinements
Take a moment to review your work. Erase any leftover guidelines and sharpen the edges of your lines. Add small details like whiskers, individual fur strands, or claw marks on the paws. Use an eraser to highlight areas, especially around the eyes and fur, for a lifelike glow.
Step 13: Optional Background
If you want to enhance your drawing, add a simple background. A snowy landscape, rocky terrain, or forest clearing can complement your wolf’s pose. Keep it subtle to avoid overshadowing your main subject.
Wrapping Up
Congratulations on finishing your realistic wolf drawing! Remember, drawing is a skill that gets better with practice. Each attempt will improve your technique.
Be proud of your progress and don’t be afraid to experiment with poses and details. Share your artwork and inspire others to try their hand at drawing. Enjoy the journey!


