Riven (2024) | Complete Walkthrough – Part 6
Welcome to Part 6 of our Riven walkthrough for 2024. In case you didn’t realise, this is a fully remade version of the classic sequel to Myst, and as such, the puzzles and solutions are completely different. In Part 6 of our Riven walkthrough 2024 we continue your journey through the entire game, so you never get stuck, lost, or frustrated with a puzzle in the remake.
Riven (2024) | Complete Walkthrough
Part 6 – Survey Island
a. The Grid Puzzle
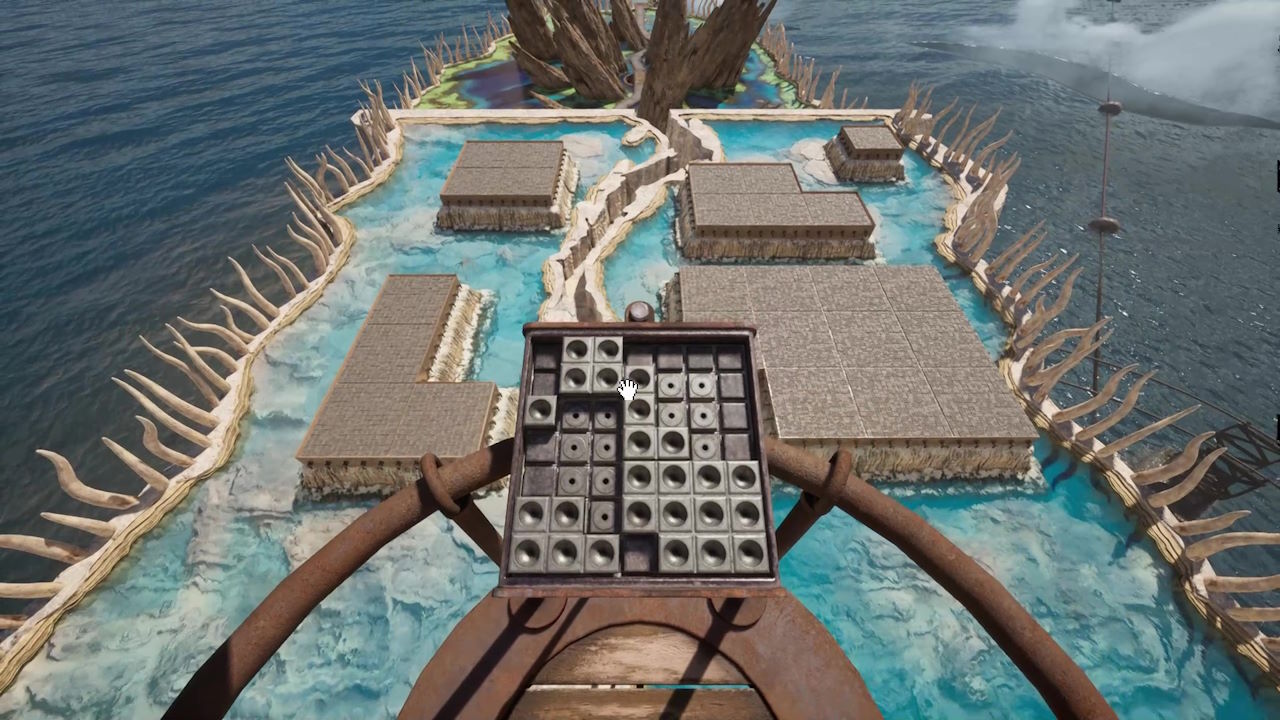
You’ll note that there is a door in front of you to the right side of the Mag-Lev. We will be coming back to that later. For now exit, on the usual left side, and head up the stairs onto Survey Island proper. Go along the windy path and then up the stairs and another windy path until you reach the lift. Press the white UP arrow to raise to the top level. Head out to the overlook, and press the white button on the brownish panel in front of you.
It will reveal a block puzzle – and the starting position of the blocks is randomised each playthrough. The idea though is to make them create a solid 5×5 square in the centre of the puzzle. To help you out further, you can look at the large blocks in the water below for a clue as to where each piece goes in relation to the others. Given the grid is 7×7, there is plenty of space to move the different shapes around. Get them all to the area of the grid they need to be, as denoted by the blocks in the water, and then connect them all to make the 5×5 grid, like below:
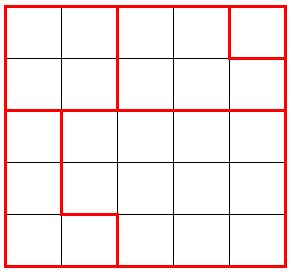
Completing this process will reveal 5 golden balls in 5 of the squares on the grid, one in each of the shapes you put together. Interact with each one to manipulate the blocks in the water below. Their surface will change to match the topography of each of the five islands. See the image below:
Now if you look up from where you are and out to sea, you will see the other islands, and can easily make out based on their shape and topography, which island is which, and you should make a note of this for later. Specifically the below:
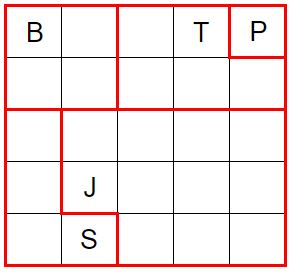
Where each letter denotes the Island. B=Boiler Island etc.
b. Survey Island Marble
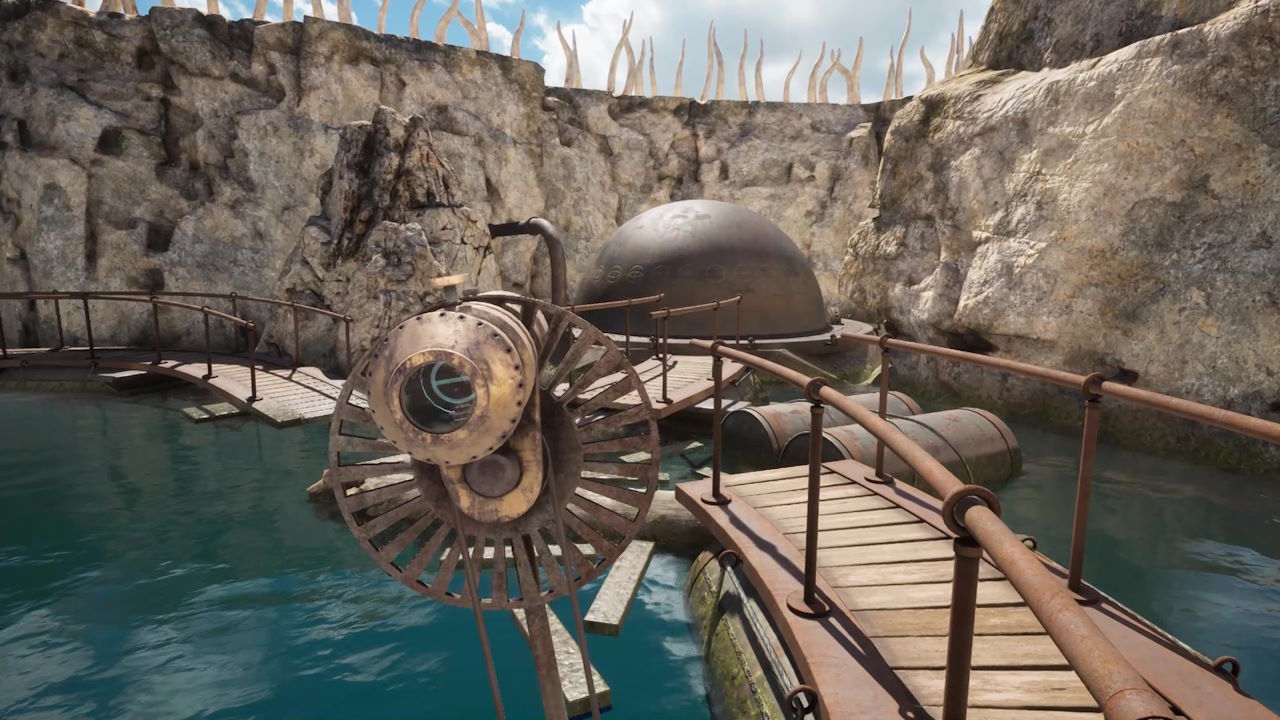
Return to the elevator, and press the white DOWN arrow to return to ground level. Head out the back of the elevator to find a water basin with a ring of metal walkways around the outside. Head right, and walk around the outside of the walkway. You may notice as you do so a large amphibious creature in the water, known as a Wahrk. We’ll be seeing it again in a bit. Keep heading around to find the Survey Island spinning dome. You should also find the Stroboscope nearby. Use the lens again to deduce that the symbol below is the one for Survey Island:
![]()
Based on this, we can deduce that the following is the symbol for Jungle Island (and we will prove it later):
![]()
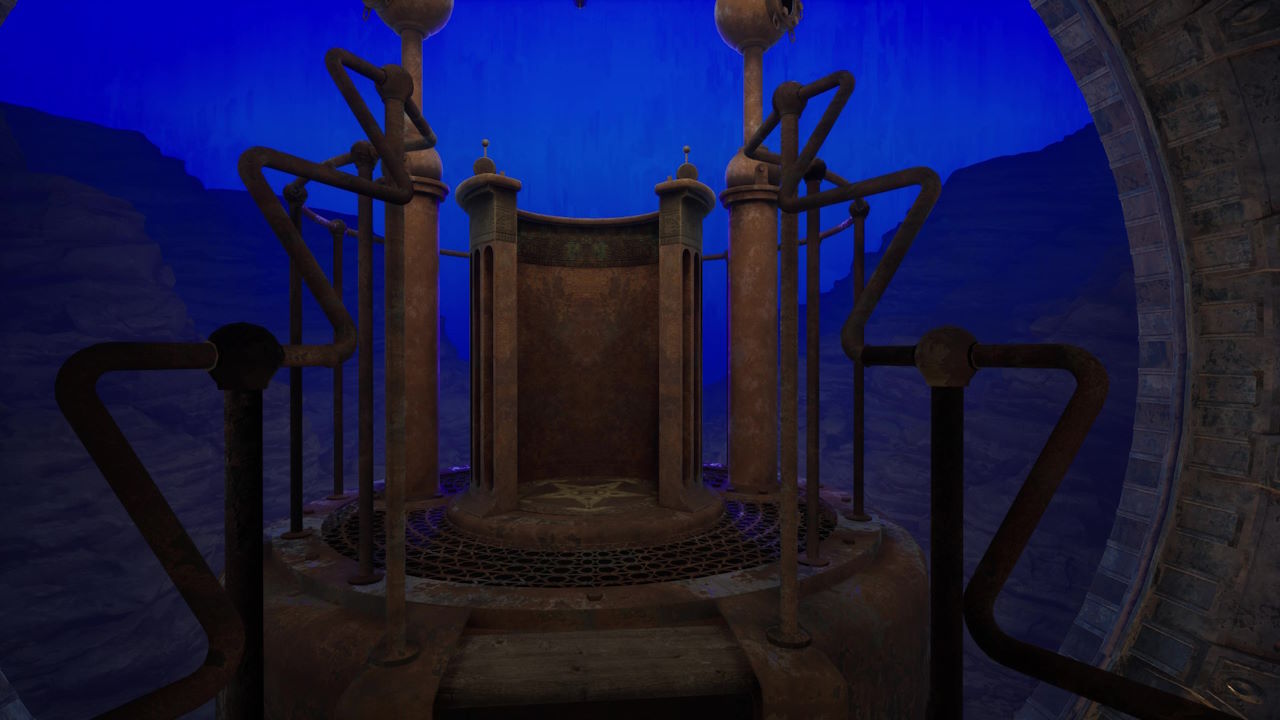
Now press the Stroboscope at the point where it displays the Survey Island symbol to open it up. As before you’ll want to head inside the dome and wait before heading into the Starry Expanse. Like all the other areas, you’ll first want to head to the end of the walkway, turn the wheel to extend the walkway, and hit the button to align the central platform. Then head back to the small machine, and like before interact with the lever three times before pressing the white button to engage the machine. We’ve now done this with three islands, only Jungle Island and Temple Island left to go.
Exit the Starry Expanse and return to Survey Island.
c. Gehn’s Spy Room
Head back to the elevator, and this time, take note of the 5×5 grid below the two arrow buttons. Interact with the grid and it will zoom into it. Now highlight the five areas on the grid that lit up when you solved the puzzle up top. Highlighting the correct 5 buttons will automatically cause the lift to descend and then move horizontally to an underground area.
Once the elevator has stopped moving, head out onto the walkway, and go to the end. You will see two levers; one to your left, and one to your right. The one on the left controls various cameras Gehn has used to spy on people (yourself included) at various places on the islands. One of them is also Catherine in her cell.
But what you need to spend your time with is the lever on the right. This will be the same but show various underwater images. You’ll also notice now that each button also has a symbol that relates to each island – plus an extra one which we’ll ignore. For each button, rotate the outside of the dial until an island symbol fits in the shape at the bottom, and then interact with it. It will turn a light on, on the screen in front of you. Keep going until you know each colour for each island symbol, and then make a note. They are as follows:
Temple: Green
Jungle: Red
Boiler: Unknown – the light didn’t work
Prison: Blue
Survey: Orange
Ignore the Yellow light as that was a symbol not related to one of the five islands. And it is OK to not know the Boiler Island colour at this point, as we can work it out later by deduction.
d: A new connecting route
Leave Gehn’s Spy Room via the elevator, and head back to the Mag-Lev at the beginning of Survey Island. Remember that door I mentioned before? Well, we’re gonna investigate it now. Enter the Mag-Lev and sit down. Turn the Mag-Lev around as normal, but instead of pushing the central lever, stand up. The Mag-Lev will open its door as usual, and will give you access to the other side of the station, and this shut door.
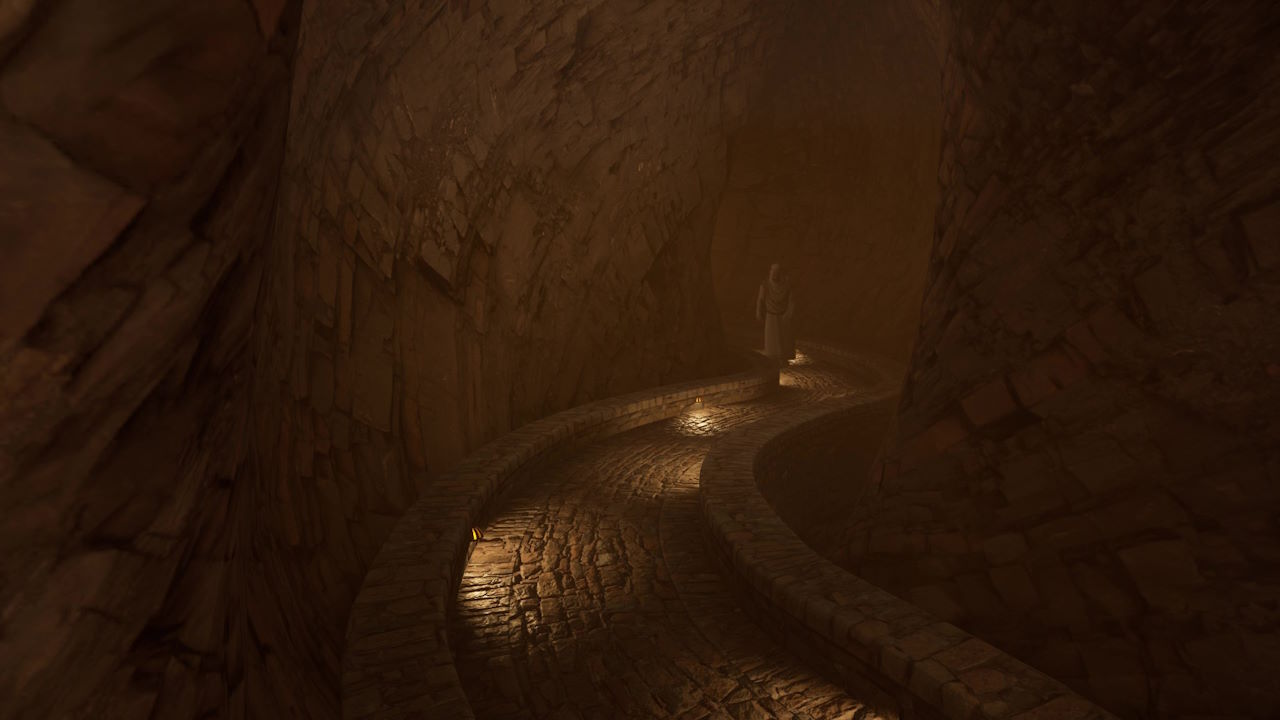
Head over to it and interact with it to open it. Head down the pathway, leading to a golden room. It might seem like a dead end, but there is a lever to your left that you can pull to call an elevator up from the depths. Head inside the elevator and press the button inside to close it and begin your descent. Head straight out and down the windy path, and the camera will stop as one of Gehn’s men appears down the corridor. Upon seeing you, they will flee, and we are going to run after them.
Once the escape has happened, you’ll be able to recall the Mag-Lev to use yourself. Once it arrives, head on board, turn it around and then set off back to Jungle Island.