Riven (2024) | Complete Walkthrough – Part 3
Welcome to Part 3 of our Riven walkthrough for 2024. In case you didn’t realise, this is a fully remade version of the classic sequel to Myst, and as such, the puzzles and solutions are completely different. In Part 3 of our Riven walkthrough 2024 we continue your journey through the entire game, so you never get stuck, lost, or frustrated with a puzzle in the remake.
Riven (2024) | Complete Walkthrough
Part 3 – Boiler Island
a. The Boiler
You’re faced with a wide caldera with various pipes and buildings dotted around. take the ladder down from the minecart, and then make your along the pathway into the caldera. In the middle you will see a valve you can turn to correspond to one of three pipes. Change the valve to the middle pipe (down-right from your perspective) as this leads to the Boiler.
Now head to Boiler itself. You can’t enter the door yet, as it is too dangerous, so follow the path from the door around to the left. Through a window, you will see a lot of boiling water, as well as metal structure in the centre of the boiler. To get access to the boiler we need to do the following:
- Drain the water
- Turn the heat off
- Raise the metal structure
A different switch completes each task. With the power now flowing to the boiler courtesy of the valve we turned, we now need to ensure the power is flowing to the correct switch before flipping it. Repeat three times to succeed.
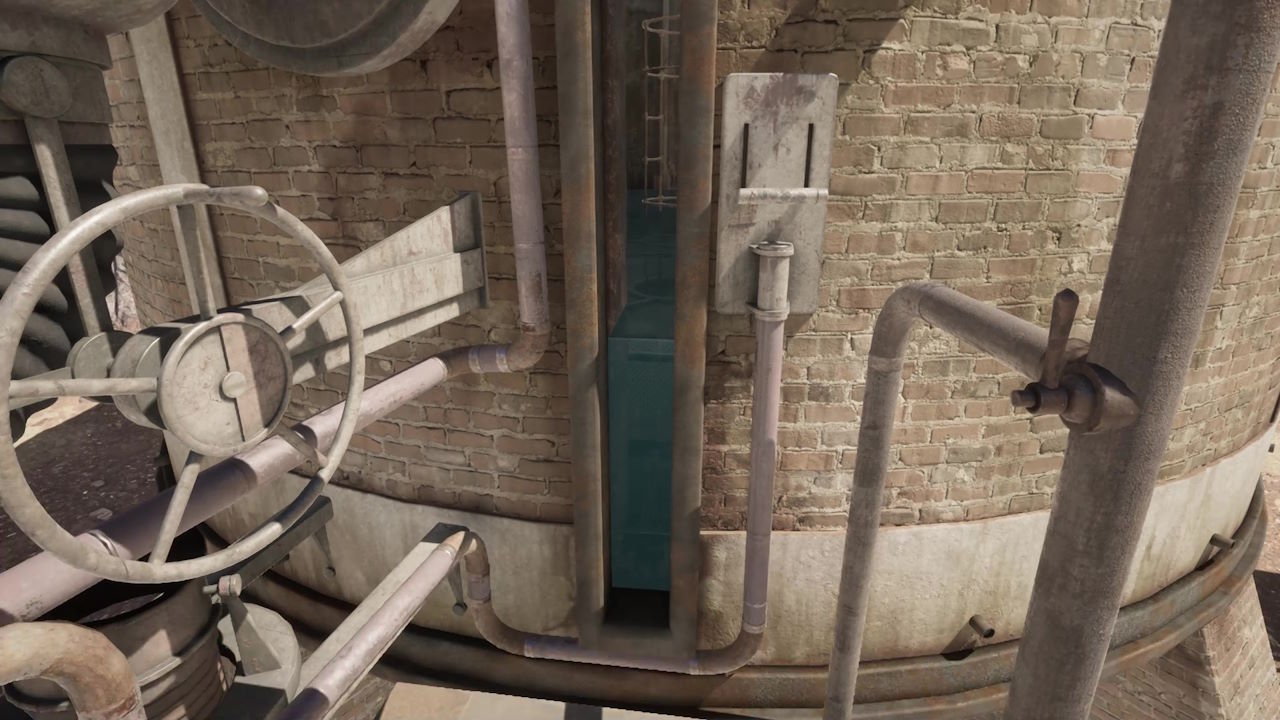
To drain the water, the lever that changes the flow of power between the two pipes (on your left) doesn’t need flipping. Simply rotate the wheel on your left, and the rubber hose will move and the water will drain.
Now flip that lever we mentioned to move the power to the right-hand side controls. Flip the lever in the upright pipe to turn off the heat, and then finally you can raise the metal structure by pulling the switch just to the right of the boiler window.
The door to the Boiler should now be open. Head inside and go down the ladder. You’ll end up at a corner point, right leads to a dead end, so head to your left. Once you’re out of the pipe, head left, and climb the cliff that will zig-zag up until you reach the top. Once you do, you will see a pit with this island’s spinning dome, which we will be seeing soon. Follow the path round and you will come to a metal cover. Press the lever to open it, and open up a shortcut back down to the caldera area.
b: Mining a Marble
To avoid backtracking at this point, head down the shortcut you have opened, and head back to the central walkway with the valve you can turn to change the power direction. This time, put it back facing the right – back towards the shortcut steps you used. Once done, return up the ladder.
Interact with the door and head through the cave. Follow the pathway through, and when you need to break away onto the left onto rocks and follow them around to head deeper. You will come to a machine in front of you. Because we have diverted the power, you can go ahead and interact with it to drain the water ahead of you.
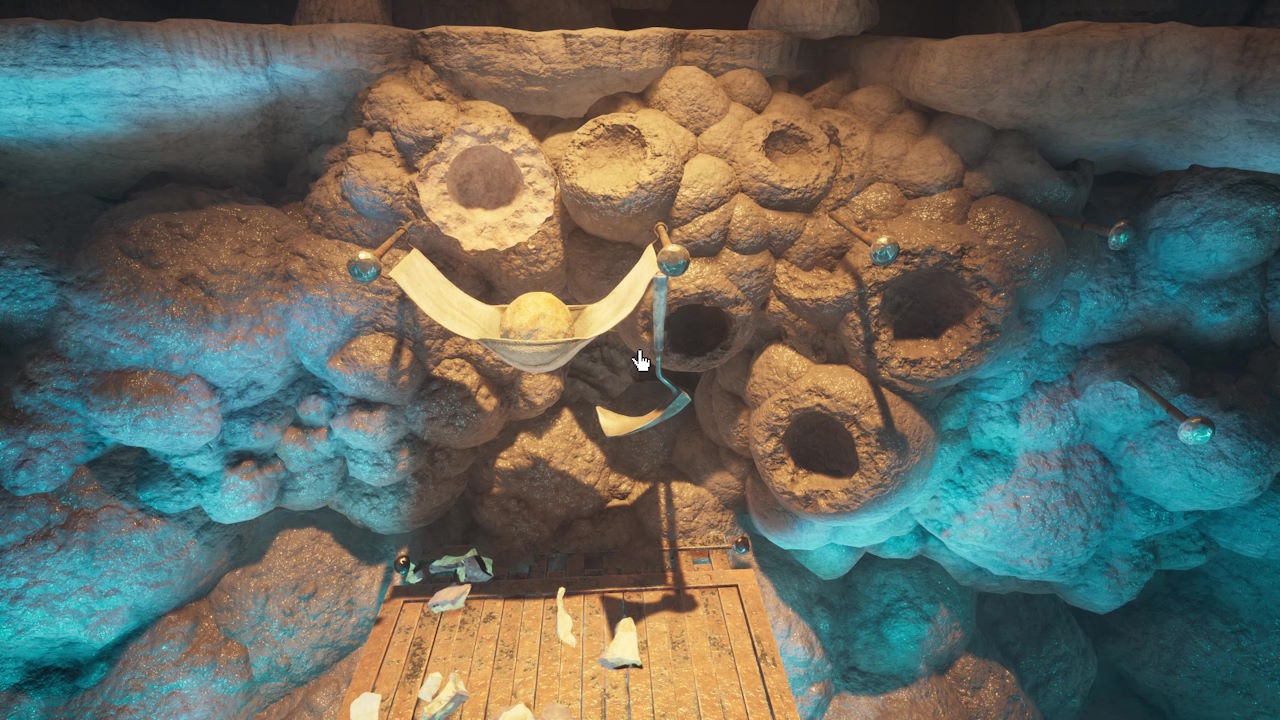
Once the water is drained, go down the ladder in front of you. Shortly, to your left, there will be a suspended piece of cloth near some rocks, like a mini hammock. Interact with the tool hanging next to it, to use it and chip off a marble from the rock, which will be caught in the hammock. Pick up the Marble, look right, and get on the machine here. There is a cute little crib for you to place the marble in here on the left, so do so to keep it safe. Now standing on the machine, turn around to face the wheel. Interact with it and (using the right stick on Xbox), rotate the wheel to move further down the track, into the cavern.
When you get to the point where you can go no further, get out. Head to a new wheel just over from you, and rotate it to lower the lift mechanism fully. Once done, the original machine will run into it automatically. Now head on the machine in the lift, then interact with the lever behind the wheel to lock the machine and lift together. Now rotate the wheel in the lift to raise it, and once at the top, pick up the marble, and enter Gehn’s Laboratory
c: Gehn’s Laboratory
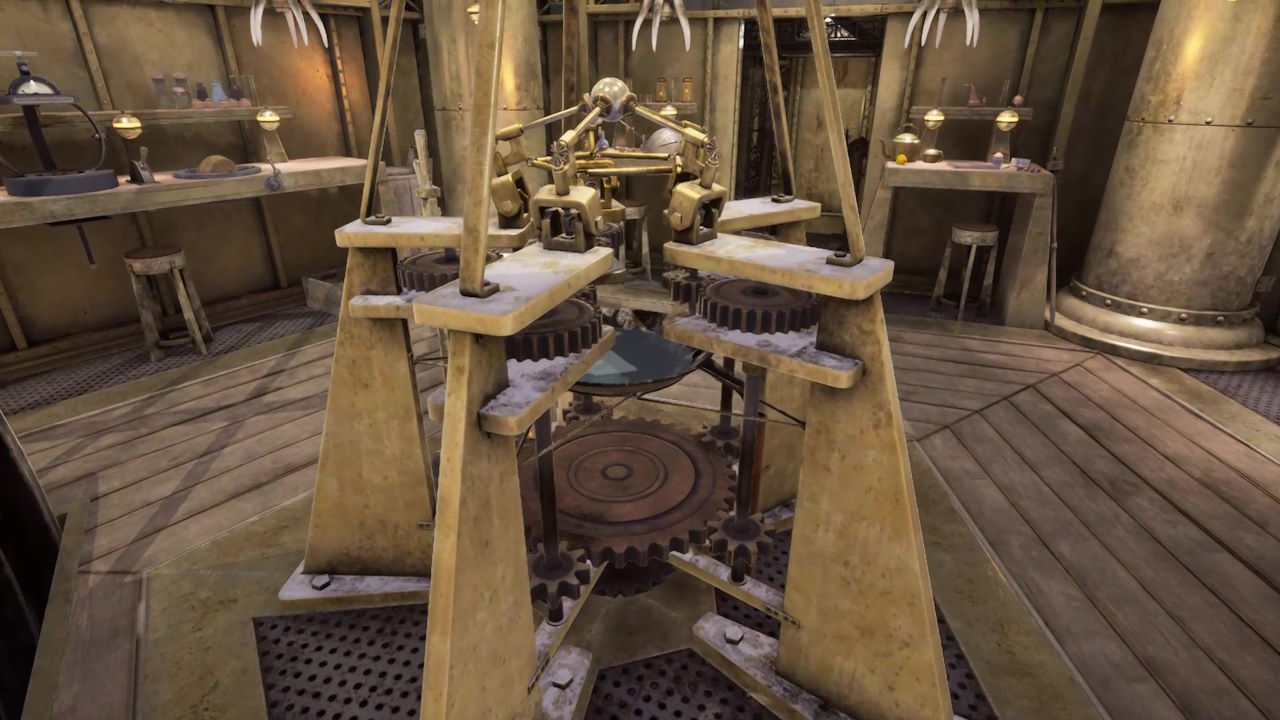
There is a lot of stuff in Gehn’s Lab to investigate, and we’ll be making of few notes of things we find that we’ll need for later in the game. Firstly, head to the right, and put your marble in the hole on the bench you can see. Interact with the vice mechanism you can see and it will cut it up. Interact with it pick up the smaller centre marble. Now put this marble in the machine to the left. We now need to look to the left and interact with the canister on the table as it will roll away, allowing us to interact with two pieces of paper. These discuss how we can turn fire marbles (what we have in our possession) into something called a power marble. They note that first, we need to understand the base value of the marble.
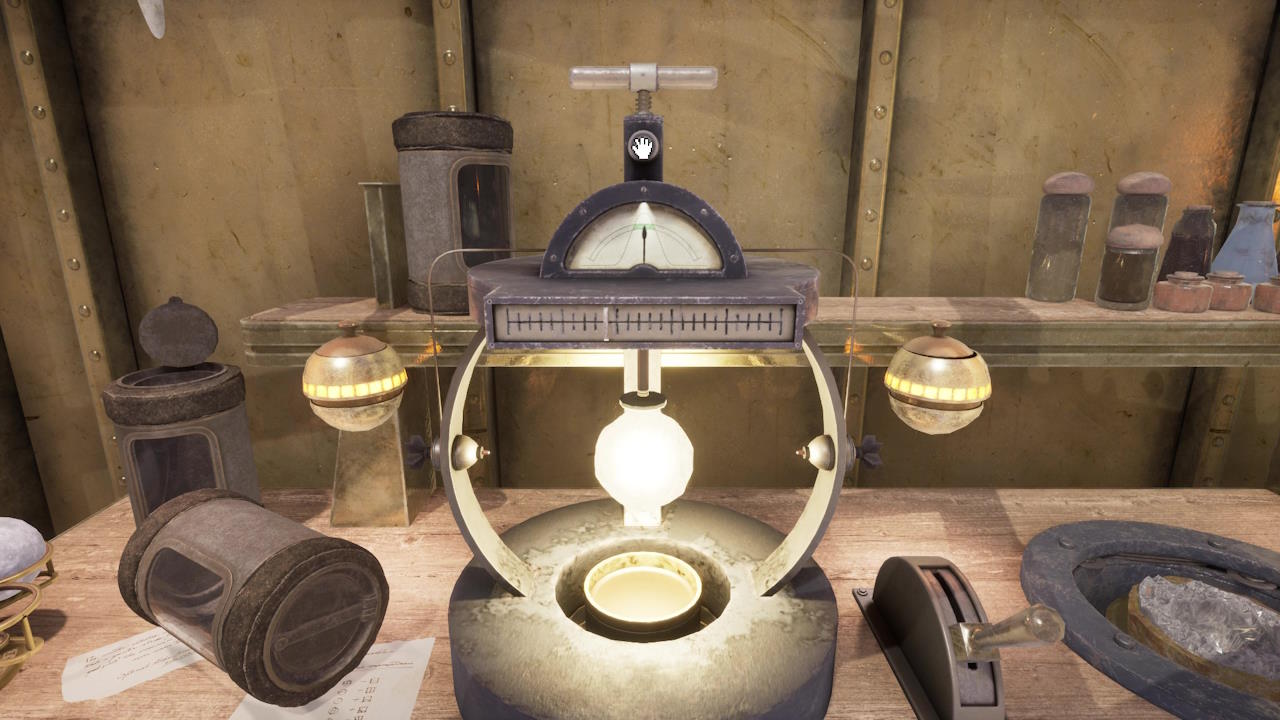
To do this we use the machine we have placed the marble in, and experiment with it until something happens. Firstly we use the slider to change the power we hit it with and observe what happens. The lines on the slider dictate numbers increasing by one, every large line being a multiple of 5. Pick a number on the slider, and then raise the handle on the top, and press the button to strike the marble with that force. If the number is to low, the arrow on the machine will stay to the left of centre. If it is too high, it will go to the right. Keep going until you find the right number. Unfortunately, the number is unique per playthrough so you will need to experiment yourself. Here’s our playthrough showing the correct strike power being 9:
Now let’s go back to those notes under the canister, particularly the one on the right. You will notice the symbols of each of the islands are on it, as well as a +/- sign and a D’ni number. At this point, you don’t know which symbol relates to which island (aside from Temple Island), so just make a note of all the information – again, they are unique to each playthrough. Below you can see the image for our playthrough:
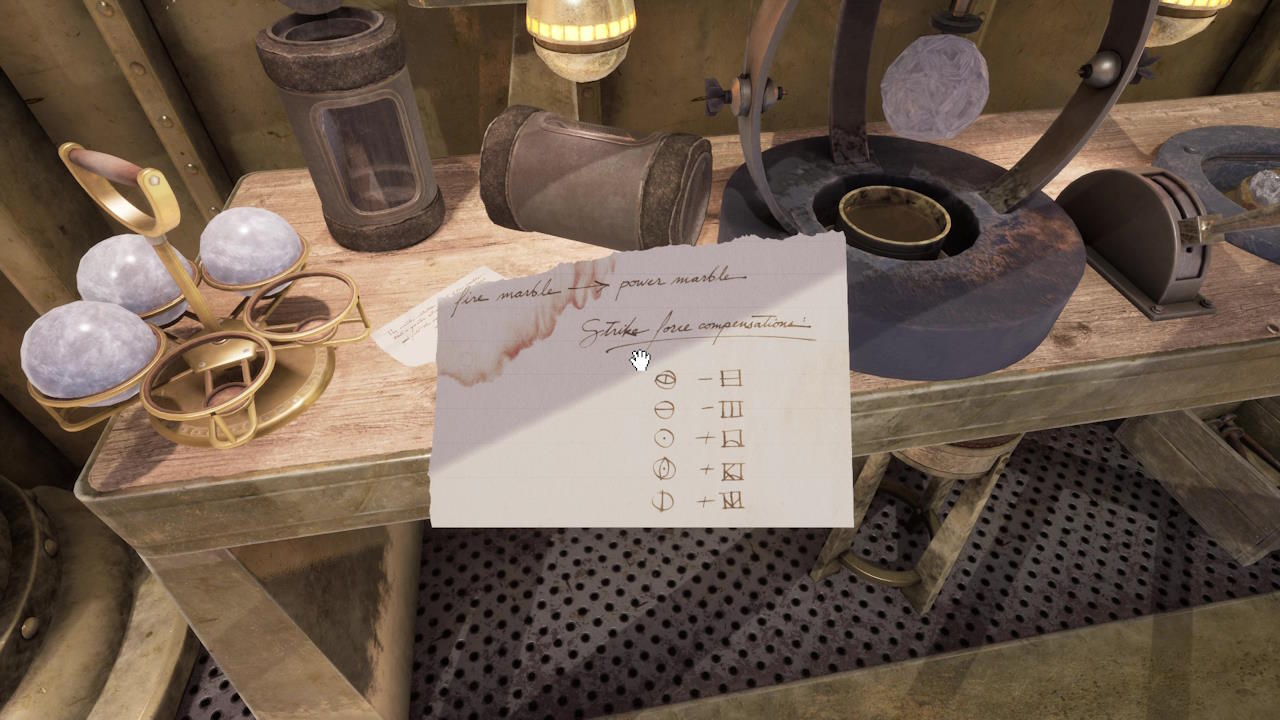
So from this image, you can see the numbers on the page translated to
-5, -1, +10, +13, and +16
Then when you factor in the base number of 9 (from our playthrough), it translates to this:
4, 8, 19, 22, and 25
Work out these numbers using your own base number and translated D’ni numbers and note them down against each island symbol.
Now turn around and head to the table to the right of the lift, to inspect Gehn’s journal. Read it all, as it has lots of useful, most notably that:
Water in Riven moves away from heat sources.
We will use this information later on.
Finally in Gehn’s Laboratory, move to the next table clockwise to find our missing Totem Eye from the totem we discovered earlier, clearly one of Gehn’s men had taken it. Use your lens on it to see the white line on it. You can’t rotate it, so you’ll need to do it in your mind, and visualise the number it makes if the white line was at the top – like it was on the totem. Do it correctly and you’ll realise this totem’s number is 4. We now have Totems 2, 4, 5, and 6. Only 1 and 3 are left to find.
Look to the left of the bench, and you will see a door. To open these doors, interact with the small handle first, and then the larger one. Heading through you will be back above the caldera.
d: The Spinning Dome
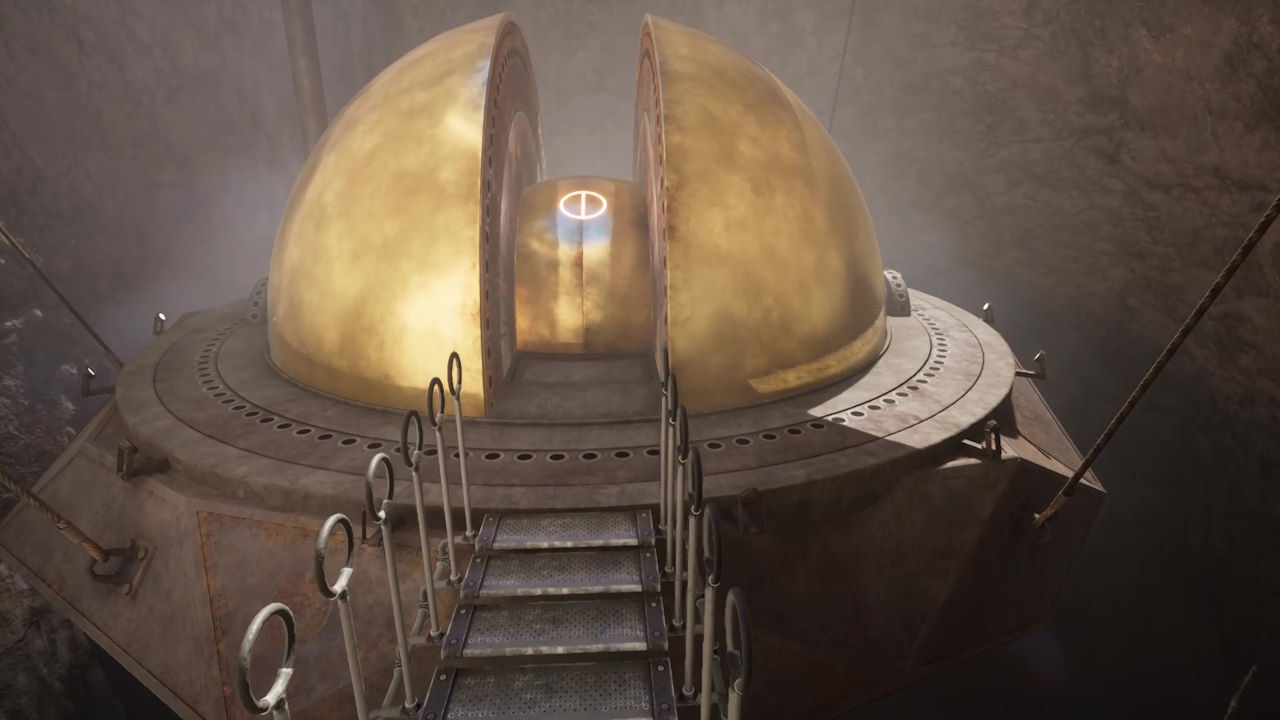
On this walkway, if you head right, it will lead to a dead end – as it is the other side of the bridge you broke to get the “Collateral Damage” achievement. So instead head left, and you’ll notice you’re heading back to the same room, above the shortcut. As you enter, you’ll realise the small junction here can be manipulated to open various doorways and shut others. For now, we want to leave them as they are though, and head straight ahead, and down some new step, and we will reach the spinning dome.
The trick to the spinning domes lies in the Moiety Lens. As the dome spins, you’ll notice a lot of symbols around the outside. Use the lens, and you will notice, that one of them has a hidden white line on it. See which one it is, you’ll find that it is the following icon:
![]()
No head back to the beginning of the orange steps, and pause, instead look to your right, and interact with the handle to reveal another of those rotating doorways, and a hidden path. Head down it to reach the Stroboscope for this spinning dome. Each dome has a Stroboscope, and the idea is we need to interact with the Stroboscope by pressing the button on its top when it displays the correct symbol for its island. Well, we know this symbol, so interact with the Stroboscope and when you see it appear, hit the button. If you do it correctly, the image will appear on the Stroboscope itself like so:
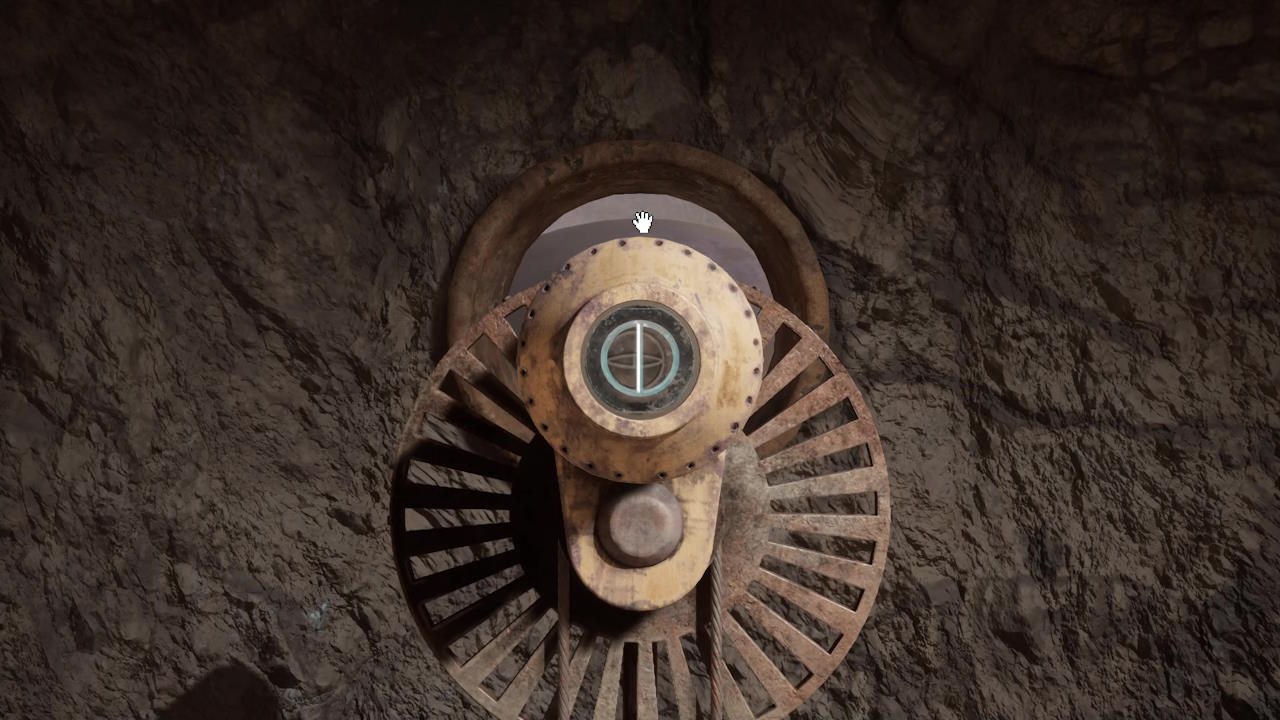
Once hit, return to the spinning dome, and it will have opened up. Head inside to transport yourself to the Starry Expanse.